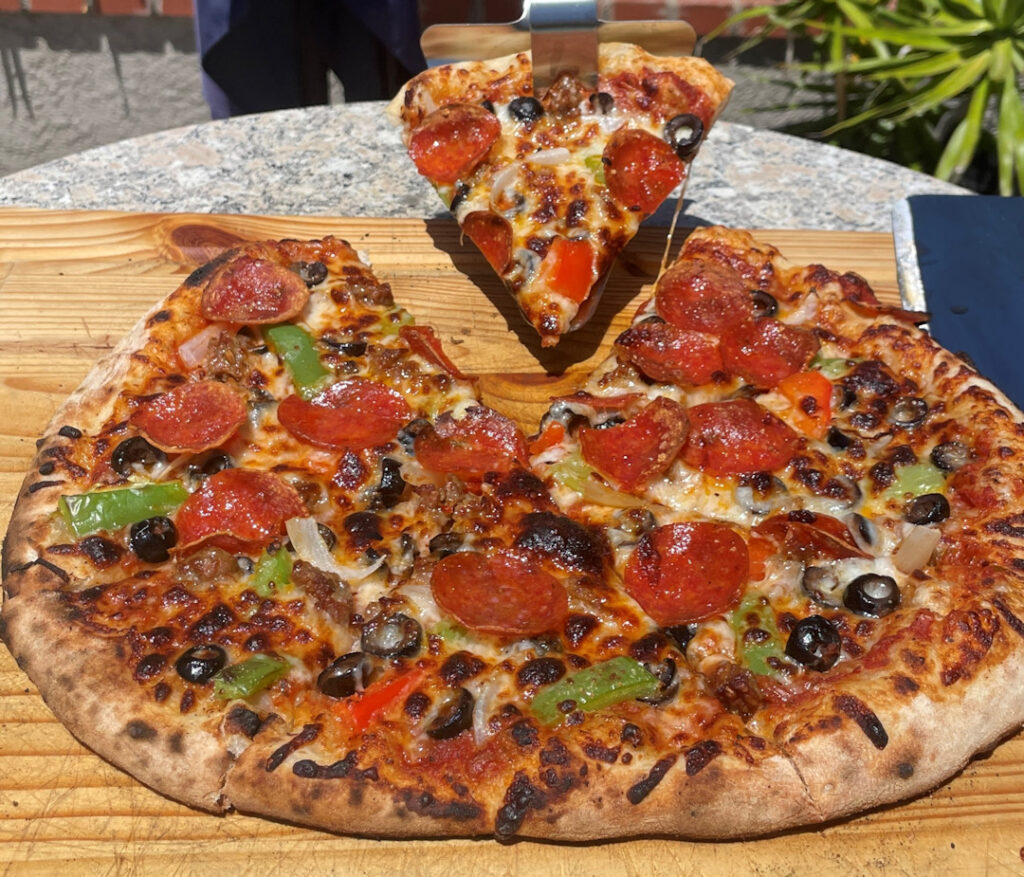
Few styles of pizza can compare to the rustic elegance of the original Neapolitan. Now, imagine infusing this classic Italian dish with the depth and tanginess of sourdough bread to make a Sourdough Neapolitan Pizza!
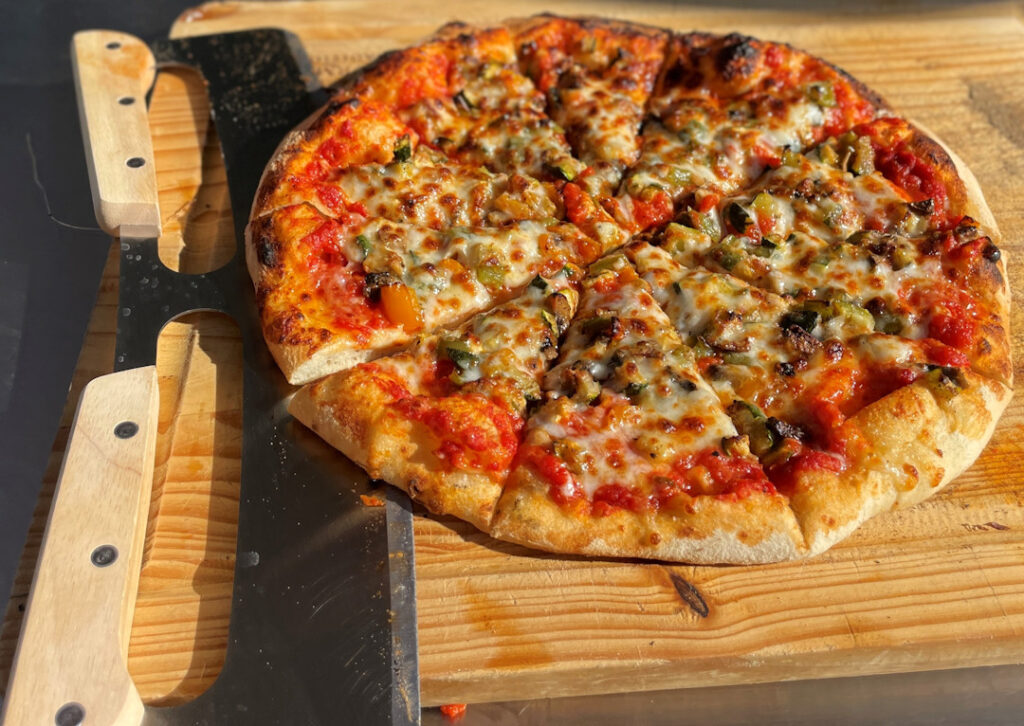
Authentic Neapolitan pizza allows for the use of a “mother dough” in getting your pizza fermentation started, so there’s nothing holding us back from making our Neapolitan pizza with a sourdough starter! So let’s go on a gastronomic adventure through the process of creating the perfect Sourdough Neapolitan Pizza – a harmonious fusion of traditional Italian techniques and the art of sourdough baking.
The Essence of the Neapolitan Pizza
Flatbread foods have been around for thousands of years. But pizza was born in Naples, Italy perhaps in the early 1800’s (and quite likely before that). Naples was not (and sadly, remains) a less than affluent city in Italy. Therefore, Neapolitans relied upon food that was inexpensive and fast (imagine fast food 200+ years ago).
Neapolitan pizza embodies the essence of simplicity. Characterized by its soft, thin crust, it is typically topped with the freshest ingredients – San Marzano tomatoes, mozzarella di bufala, fresh basil, and (sometimes) a drizzle of olive oil. The key to its allure lies in its traditional cooking method – in a wood-fired oven at high temperatures, resulting in a blistered, slightly charred crust that’s soft and pliable.
There are many ways to make pizza, but the Associazione Verace Pizza Napoletana (AVPN) sets a very high and specific bar for making the true original – Neapolitan pizza dough.
What’s So Special About Neapolitan Pizza Dough?
Other than it being the “original”, this pizza dough has some amazing characteristics that are brought out when cooked in a wood-fired oven. AVPN recommends the Ooni Karu 16. However, we use the Solo Stove Pi and we’ve been very happy with our Neapolitans (even when we use the propane feature – don’t tell the AVPN!).
Still, this dough recipe will still produce lovely results in your conventional oven (generally at its highest temperature), especially when using a pizza stone.
Sourdough Starter
Sourdough is one of the most common pizza starters along with biga and poolish. Much like in artisan breads, a starter is a common way to start pizzas too. Using a starter for your pizza can give it extra depth and complexity of flavor, rich texture, accelerated fermentation (which means faster proofing time), and even some digestive benefits.
What makes a sourdough starter different from biga and poolish is that it does not use added yeast. It is wild fermented from yeasts and bacteria in the air.
How to Make Sourdough Pizza Dough
Although you can buy sourdough starters (or perhaps pilfer one from Boudin Bakery, the reputed home of the original San Francisco sourdough), you can also make it at home.
And it almost couldn’t be simpler to make your own sourdough starter!
It’s simply a mix of equal parts flour and water (by weight) placed in a jar and left to ferment. There are already trace amounts of yeast in flour and throughout your kitchen that will naturally begin fermenting the yeast once it is provided water.
Although you can specifically use the flour you plan to use for your pizza (for example type 00, as found in Neapolitan pizza dough, you can certainly use any flour you choose since at the end it will not be a big component of the final dough.
Steps for Making Sourdough Bread Pizza Starter

- Add 1 ounce of water to an 8 ounce mason jar.
- As tap water can have a lot of chlorine (which will inhibit yeast and bacteria growth), bottled drinking water is ideal. More on this below.
- Add 1 ounce of flour of your choice (type 00 or bread flour are the most common).
- Stir with a butter knife so that you can scrape it on the edge – it will be very sticky!
- Cover with a lid and store at room temperature out of sunlight (cupboard is great).
- 24 hours later, you need to feed the starter. You can either discard half of the starter, or you can split it and feed two starters (makes a nice gift for other bakers!)
- Split the starter in two. Discard half (or start a second).
- Add 1 ounces of water
- Add 1 ounces of flour
- Stir.
- Cover and store again at room temperature.
- Repeat again tomorrow.
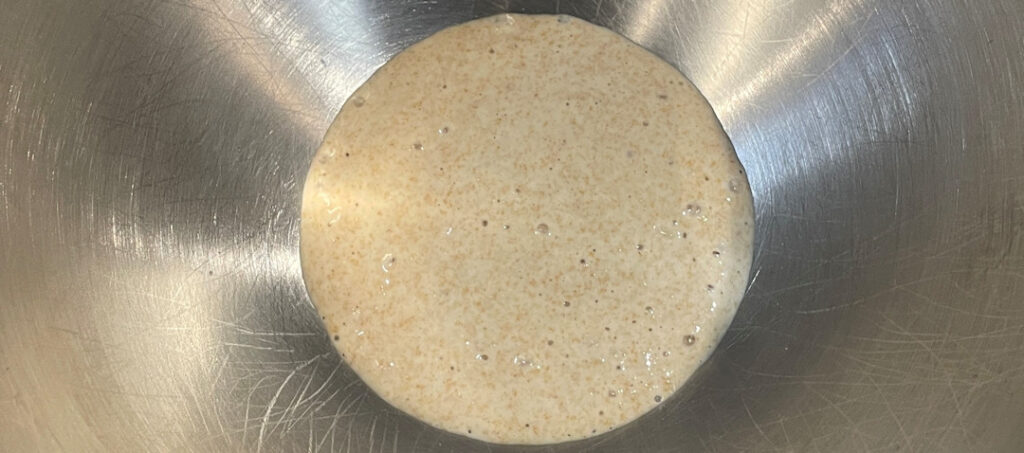
- After 3 fermentations, the starter should be bubbling and doubling in size each day, indicating it is fermenting well.
- Don’t be discouraged if you need to go another couple of days, however further feedings will result in a bigger starter – you may need to move to a bigger jar.
- Once the starter is fermenting well, you can either continue to nurture it or you can do your one-time sourdough pizza.

Tip: Water For Pizza
Per King Arthur Baking, the ideal water for bread (and therefore pizza) is of medium hardness and with little or no chlorine. Why? The mineral content of the water affects the activity of the yeast and the production of gluten. The sweet spot is between 100 to 150 parts per million.
Most times, tap water is going to be fine. Conventionally filtered water (like using a Brita or Pur) is a step up because it should remove particulates and should allow the chlorine to dissipate.
However, reverse osmosis filtration will soften your water, so if you already have soft water, using RO filtered water is going to work against you. If your tap water is generally hard, then RO filtered water is going to be a good choice.
Bottled drinking water generally has minerals added for improved taste (such as Dasani) and therefore will also work well. The trace amounts of salt added in most US brands should not affect the fermentation.
Nurturing Your Sourdough Starter
If you are planning to create and keep a sourdough starter for a number of uses and a long period of time, you should repeat these steps every 24 hours for 1 week. The starter will rise and bubble for about 12 hours and then may fall in the second 12 hours, which is normal.
This process of repeatedly feeding the starter will encourage the wild yeasts and bacteria to become fully active in fermenting your starter. And the starter will be something you can use for a long, long time to come. After the first week of nurturing, you can store the starter in the fridge, but you will have to feed it every 1-2 weeks. This requires a bit more commitment, but pays off if you love sourdough.
Sourdough in Neapolitan Pizza
Now that your sourdough starter is active, you are ready to start your sourdough pizza.
Unlike making a full-on sourdough pizza, a true Neapolitan pizza (as defined by the Associazione Verace Pizza Napoletana (AVPN) has a stated limit to the amount of prefermented (aka mother dough) that you can use: 5% to 20% of the final dough by weight.
In which case, you only need 2 ounces of starter for a single 10 ounce pizza dough.
If you plan to continue to nurture your starter, separate out 2 ounces of your sourdough starter into a new, slightly larger container (at least 16 ounces). Add 2 more ounces of water and 2 more ounces of flour. Store at room temperature for 24 hours. Feed this larger starter again in 24 hours. It should be bubbling and growing after each feeding. This will give you enough for 2 standard AVPN pizzas.
One-Time Sourdough
On the other hand, if you’re just making this for one round of pizza making, after the starter has taken off, you can feed it until it is the proper ratio for the final pizza dough recipe.
Sourdough Discard Pizza Dough No Yeast
This pizza is also commonly called “sourdough discard pizza” crust or dough. The reason it can be called “discard” is because you are making it from the discarded half of your starter. Many sourdough bread bakers are regularly discarding half of their “mother dough” when the starter needs to be fed but they are not going to use it. Hence, the pizza is made from the discarded portion.
This recipe also gets one of its other names because no extra yeast is added – it’s already naturally present in the sourdough!
Sourdough Hack: Biga
Biga differs from sourdough because it doesn’t wait for wild fermentation – it uses yeast to get things rolling. It has a slightly lower water content than sourdough to keep the fermentation process a little slower – which results in the biga developing a complex flavor with a subtle sourness and contribute to a chewier texture in the final product.
If your goal is to make something akin to a sourdough but without going through the process of making an actual sourdough, Biga Pizza Starters are the next best thing. Learn about those here.
If you want to make this pizza in a hurry, you can also add 1/2 teaspoon of yeast to the dough to accelerate the fermentation. It won’t be quite as good as letting it ferment naturally, but it’ll get the dough ready in as little as an hour.
Ingredients for Sourdough Neapolitan Pizza Dough
This will make just over 1 pound of pizza dough – sufficient for two 12″ pizzas.
- 4 ounces of sourdough starter
- .75 cups of tap or bottled water (“moderately hard water”)
- 2 cups of Type 00 flour
- 1.5 teaspoons of salt
How to Make Sourdough Neapolitan Pizza Dough
- Pour the water into the mixing bowl of a stand mixer. If you don’t have one, you can totally do this all by hand.
- Add the salt. Using a small whisk or a spoon, dissolve the salt into the water completely.
- Add the sourdough starter.
- Add about 1/2 cup of flour into the water.
- Start your stand mixer using the hook attachment on its slowest setting and slowly add the flour. Not all flour hydrates the same, so it may be that you’ll need a little less or a little more flour.
- The dough will form into a single compact ball.
- When this happens, stop the mixer and check the texture.
- Put a little flour on your hands and pull the dough off of the hook.
- Knead the dough in your hands.
- The texture and moistness should be consistent throughout. If it is not, return it to the mixer for another minute and check again.
- The dough should be slightly tacky and smooth but should not be leaving much sticking to your hands. If it is, return it to the mixer and continue adding flour – slowly.
- The final dough ball should be “fat” in appearance and sticky, soft, elastic, and smooth to the touch.
- Place the dough on a clean surface and cover with a damp cloth for one hour, which allows the sourdough to begin developing the gluten in the rest of the flour. The damp cloth is important to keep the outer surface from drying out.

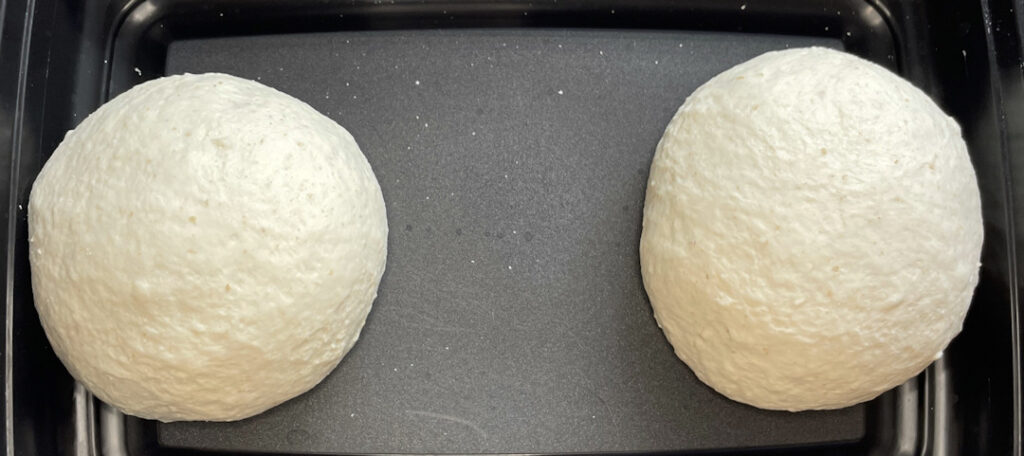
- Remove the damp cloth and separate the dough into two balls of equal size (this recipe will make two dough balls approximately 9.5 ounces – which is right at the upper size limit).
- Work the two halves into balls (the traditional technique is to shape them the same way Italians prepare fresh mozzarella balls).
- Place the two balls into one or two sealed containers – the dough balls will double in size, so make sure they have enough room.
- Because of the head-start provided by the sourdough starter, the dough will proof more quickly than it would without. That means your dough will be ready in as little as 6 hours at room temperature, although 24 hours at room temperature will further enhance the development of the dough.
- As a note, after 24 hours at room temperature, I find the dough begins to get more difficult to work with – more likely to tear. So, either slow the fermentation by refrigerating or plan ahead on timing.
- The final dough will have become extensible (meaning you can stretch it) but not very elastic – perfect for making our pizza.
Stretching Out Sourdough Neapolitan Pizza Crust
To be authentic, you MUST stretch the dough by hand. There’s even a specific technique for this. But then there’s also a good reason for this. The goal is to move the air inside the dough into the outer edge of the crust, which is called the “cornicione”. This is going to create a lovely, airy frame for the edge of your pizza.
- Place a light layer of flour on your work surface.
- Semolina (coarse) flour can be used for this – and I found it to be really helpful for stretching the dough. But you do not want too much absorbed into the dough – so if the dough is very sticky, you might choose to use your 00 (at least to start).
- Remove one dough ball from its container onto the floured work surface.
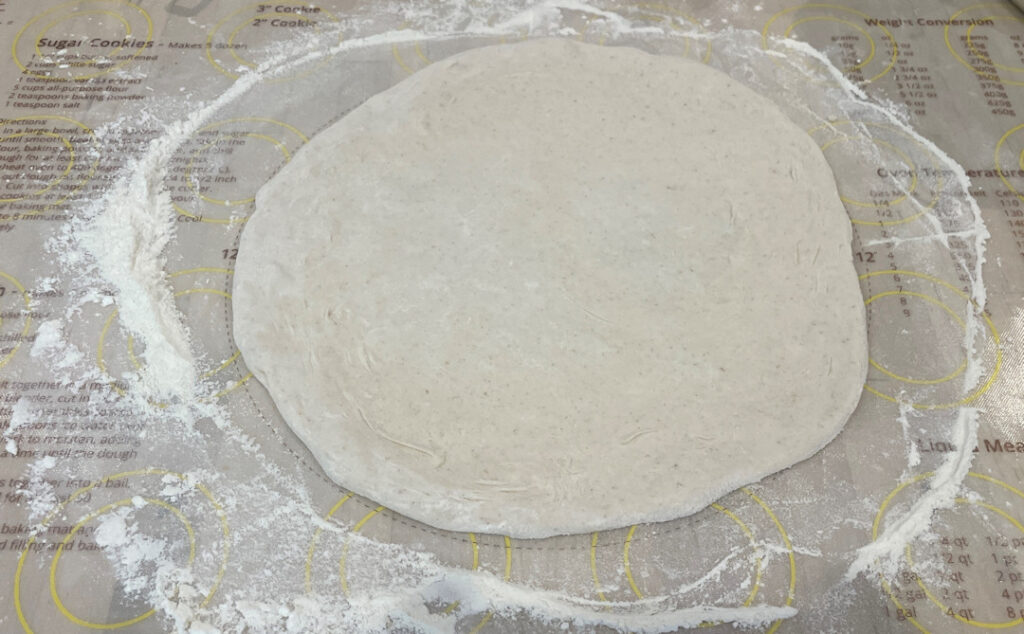
- “With a motion from the center outwards, and with the pressure of the fingers of both hands on the dough ball…”, stretch your two hands apart and then lift and turn the dough 90 degrees.
- Continue to do this while forming a more-or-less round shape and creating a taller outer rim about 0.5 inches tall.
- You may need more flour during this process but you should use as little extra as possible.
- Done right (which is not easy), the center of the crust should be just 0.1 inches thick. That’s less than the thickness of two pennies!
- You’re better off with a thicker, smaller pizza than risk making a hole.
- If you do make a hole, ball the dough up and try again. This will likely add more flour and density to your pizza, so its best to avoid making a hole – especially a second time.
Time to Make Your Sourdough Neapolitan Pizza
Now that your dough is ready, it’s time to prepare and cook your pizza. I recommend you consider the classic Margherita!
Sourdough Neapolitan Pizza: Margherita Style!
The Margherita pizza & topping combination is more than 200 years old making the Neapolitan Margherita Pizza both classic and yet still a modern pinnacle in pizza achievement!
What is a Margherita Pizza?
The color of the toppings represent the colors of the Italian flag: Red (tomato sauce), White (mozzarella cheese), and Green (Basil). Extra virgin olive oil and parmesan cheese are generally accepted extras (but don’t take chances with a Mafioso!).
You can learn more about Margherita pizzas here.
Tips for Margherita Pizza
- You’re working with just three toppings. Go the extra mile and get quality products!
- Fresh basil simply cannot be replaced with dried flakes. Splurge. Or find a neighbor growing some. Please!
- You may be tempted to buy “pizza sauce”. That’s not how it’s done in Naples. They rely on a simple tomato sauce. You can buy a great sauce for this pizza off the shelf, but you’ve come this far – why not make your own using our recipe for authentic sauce?
- You may be intimidated to try whole mozzarella. It’s not cheap and it expires quickly. Again, you’ve come this far in making an amazing pizza – why not go for it?
Cooking your Neapolitan Sourdough Pizza
Now that your dough is ready and you’ve decided on your toppings, it’s time to prepare and cook your pizza.
- Preheat your oven (a wood-fired pizza oven is best at >900ºF; a conventional indoor oven: 450º)
- Spread a light mixture of flour (coarse grain like semolina is great for this) and/or cornmeal on your pizza peel
- Place the dough on the pizza peel, quickly apply your toppings, and launch into the pizza oven!
- Turn your pizza:
- in an outdoor oven, about ever 45 seconds turn it a quarter turn 4 times until done
- in an indoor oven, cook for about 10 minutes and turn once, then cook for 5 more minutes and turn off the oven and leave it for 5 more minutes.
- Remove and let stand for about 3 minutes.
- Cut and serve immediately!
Sourdough Supplies & Accessories?
If you need to round out your collection of sourdough accessories – from crocks to proofers to an off-the-shelf starter, check out King Arthur’s selection.

In Closing: A Slice of Artistry
Sourdough Neapolitan Pizza isn’t just a dish; it’s a journey of patience, skill, and a deep appreciation for classic culinary traditions. By infusing the time-honored Neapolitan pizza with the complexity of sourdough, we pay homage to the artistry of both techniques. So, take your time and use patience as the craftsmanship that goes into each slice requires a labor of love! But that effort unites the past and present into a delectable creation to be proud of!
Neapolitan Sourdough Pizza Dough Recipe
Equipment
- 1 Stand Mixer (Optional)
- 1 Wood-burning pizza oven AVPN says this is required, but use what you've got!
Ingredients
- 6 Ounces Water This is for the sourdough. Tap or bottled drinking water are ideal.
- 6 Ounces Flour This is for your sourdough and you can use flour of your choice. Many people prefer whole wheat flour for sourdough.
- .75 Cup Water Tap, filtered, or bottled drinking water are ideal.
- 1 ½ Tsp Sea salt
- 2 Cups 00 Pizza Flour
- 2 Tbsp Semolina flour (if you don't have semolina, any flour will do, including 00 or all-purpose)
Instructions
Making the Sourdough Starter
- Day 1: Add 1 ounce of filtered or bottled water to an 8 ounce mason jar. Add 1 ounce of flour of your choice (type 00 or bread flour are the most common). Stir with a butter knife so that you can scrape it on the edge.Cover with a lid and store at room temperature out of sunlight (cupboard is great).
- Day 2: Split the starter in two. Discard half (or start a second) and feed the remaining half:· Add 1 ounces of water.· Add 1 ounces of flour.· Stir.· Cover and store again at room temperature.
- Day 3: Repeat steps from Day 2.
- Day 4: Repeat steps from Day 2.
- Day 5: The starter should be bubbling and doubling in size each day, indicating it is fermenting well.You now should have about 4 ounces of sourdough starter and can either 1) make your dough now or 2) split the dough once more and keep and feed BOTH halves and make your dough tomorrow.
Making the Dough
- Pour the water into the mixing bowl of a stand mixer. Pour the salt into the water and whisk (or stir) until the salt is dissolved.Add your sourdough starter.Add about 1/2 cup of flour into the water.
- Start your stand mixer using the hook attachment on its slowest setting.
- Slowly add more flour. Not all flour hydrates the same, so it may be that you'll need a little less or a little more flour.
- If you don't have a stand mixer, you can do this all by hand. Just make a "volcano" of all of the flour and pour the water into the middle. Slowly move and mix the "volcano" walls into the water.
Checking the Dough
- The dough will form into a single compact ball.· When this happens, stop the mixer and check the texture. · Dust your hands with flour and pull the dough off of the hook. · Knead the dough in your hands. · The texture and moistness should be consistent throughout. If it is not, return it to the mixer and check again. · The dough should be slightly tacky and smooth but should not be leaving much sticking to your hands. If it is, return it to the mixer and continue adding flour – slowly. · The final dough ball should be "fat" in appearance and sticky, soft, elastic, and smooth to the touch.


First Fermentation
- Place the dough on a clean surface and cover with a damp cloth for one hour. The damp cloth is important to keep the outer surface from drying out.

Second Fermentation
- Remove the damp cloth and separate the dough into two balls of equal size (this recipe will make two dough balls approximately 9.5 to 9.9 ounces – which is right at the upper size limit).
- Work the two halves into balls (the traditional technique is to shape them the same way Italians prepare fresh mozzarella balls).
- Place the two balls into one or two sealed containers – the dough balls will double in size, so make sure they have enough room.
- Let the dough rest for 24 hours at room temperature.

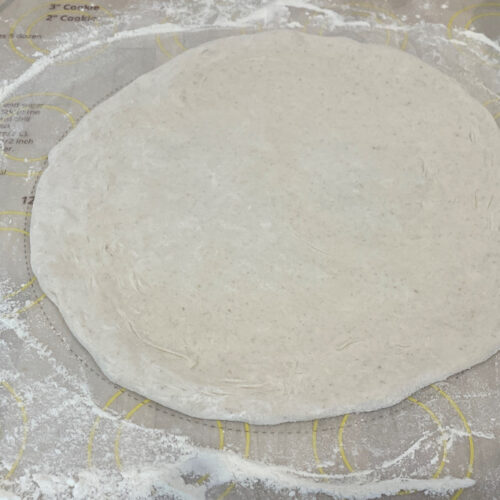
Stretching the Dough
- After the second fermentation, the dough will have become extensible (meaning you can stretch it) but not very elastic.
- Put 1 tablespoon of semolina flour on your work surface
- Remove one dough ball from its container onto the floured work surface.
- Stretch the dough by hand from the center to the edge. Create a round shape but ensure that the edge of the crust is about 0.5" tall and 0.5" to 1" wide and the rest of the crust is very thin (less than two pennies, if you can).(If needed, add more flour to the work surface so the pizza does not stick, but do not use more than you need)
- With this recipe (which makes two 9 ounce pizza dough balls), you should be able to make up to a 12" pizza.
- Put 1 tablespoon of semolina flour and a pinch of cornmeal on your pizza peel (so the dough will not stick when launched into the oven).
- Transfer your dough to the pizza peel.
- You will want to quickly apply your toppings and get the pizza into the oven before the dough sticks to the peel.
- Launch the pizza into the oven on the hottest part of the stone without being in the flames.
- Before rotating the pizza, make sure that Rotate the pizza one quarter turn every 45 seconds. Generally, the pizza will be done in 6 minutes or less. So watch it closely!
- Remove the pizza from the oven and let it rest for about 3 minutes.
- Cut and serve immediately.


Notes
- If you are going to cook this in a conventional oven, you’ll want the highest temperature you can get the oven to.
- If you have a pizza stone (or pizza steel), that’s going to help a lot in getting the most authentic crust. If not, a pizza pan (or cookie sheet) will still turn out a great pizza.
- You can either start the pizza on a pan (or cookie sheet) and transfer it to the stone after about 10 minutes (when the crust is firm enough to be safely transferred). At this point, turn off the oven and let the pizza cook on the stone for another 5 minutes. Remove and let rest on a cutting board for another 5 minutes before cutting and serving.
- Alternatively, you can start by launching the pizza directly to the pizza stone in your oven. This is more tricky and you might want to practice with some dough with no toppings!
Nutrition

Todd’s cooking skills have revolved around the grill since about age 12, when he developed a love for grilling and took over for Mom at the BBQ. He worked at Wendy’s and at Earl’s Tin Palace (a restaurant chain in Canada) but never really did any sort of baking…until he and Heather started making pizza together! Now he’s often making dough in the mornings and pizza in the evenings.