I’m excited to share my experience using Tony Gemignani flour to make his classic Master Dough recipe. He calls this “the quintessential American pizza dough,” so we’d better learn about it!
When I started learning a little about the pizza-making experts, it was impossible not to hear of Tony Gemignani. 13-time World Pizza Cup Champion, owner of Slice House restaurant, and author of The Pizza Bible – that’s a lot of credentials!
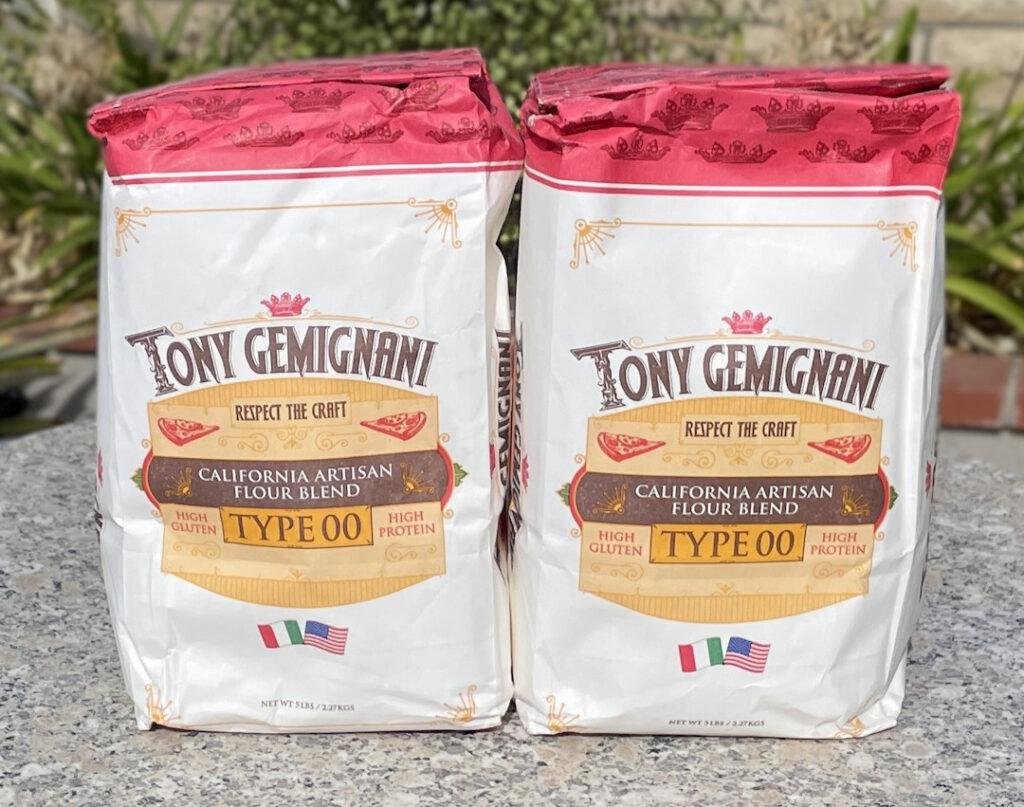
So when I discovered that Central Milling makes Tony Gemignani flour, I had to try it out!
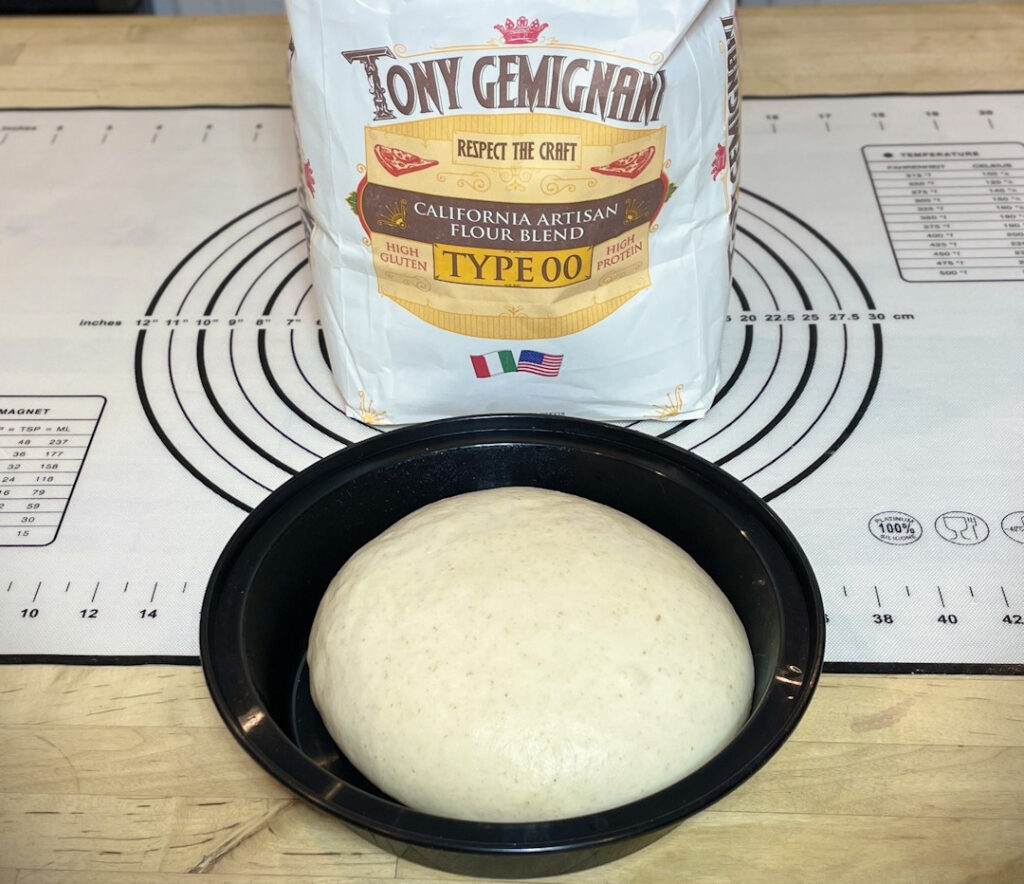
Tony Gemignani Flour: “California Artisan” Type 00
Tony Gemignani’s quest to create the ideal pizza flour was driven by a clear vision: a versatile flour that avoids the common ‘bready’ flavor of many pizza bases. The result of a three-year collaboration, this flour blend is designed to capture the essence of traditional New York-style pizza while being adaptable to various pizza styles. His partnership with Central Milling, a Utah-based company specializing in milling and distributing organic flour (and employee-owned, which I really like), resulted in a blend of very specialized pizza flour.
To quote Central Milling’s website‘s product description:
Designed by Tony Gemignani – 13-time World Pizza Cup Champion – this artisan pizza flour is a proprietary blend of hard wheat varieties. To create this flour, we first focused on the flavor Tony wanted. Then, we optimized the blend to work in the demanding environment of a pizza house. The flour ran the gauntlet in Tony’s restaurants for six months before earning Tony’s coveted stamp of approval. Tony Gemignani pizza flour works well for most styles of pizza, focaccia and breadsticks, and even baguettes!
Applications for Tony’s Flour
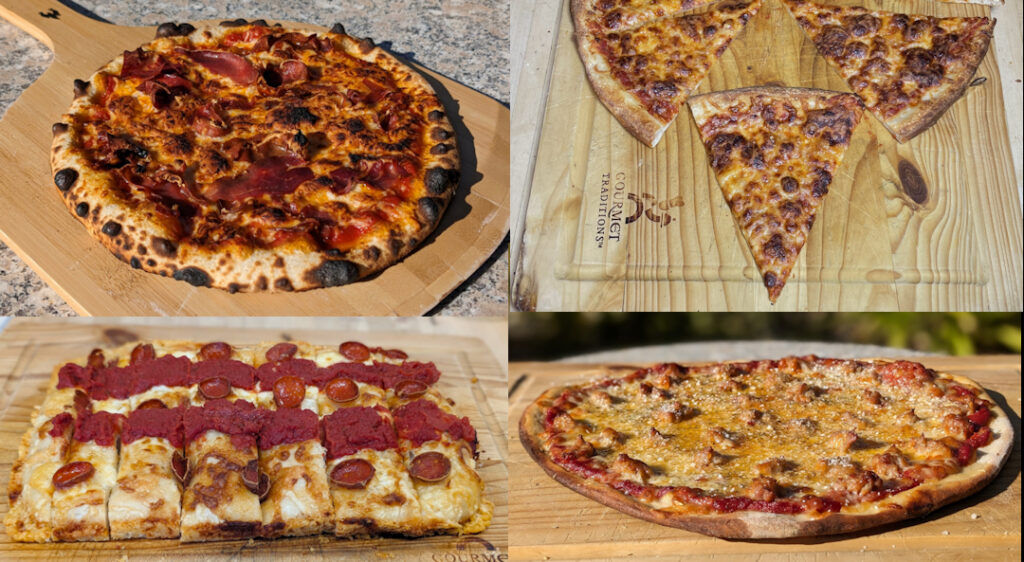
I’ve found this to be an excellent choice of flour for pretty much every American-style pizza application.
While I love this flour in the applications Tony designed it for, it wasn’t my favorite for Neapolitan. Even Tony doesn’t use it for Neapolitan (according to him, it is ideally designed for 500° to 650° Fahrenheit and not for use in high-temperature wood-fired ovens).
Tony Gemignani Flour Specifications:
- Protein: 15% (that’s really high!)
- W Index Rating: 390-400 (that’s also really high!)*
- Ash: 0.55%**
- Kosher
- Non-GMO certified
- Ideal cooking temperature: 500°F to 650°F
*W Index Rating?
Flours have a “W index rating,” which rates their strength (gluten and protein content) and ability to absorb water. Generally speaking, a higher W rating is good for pizza, as it lends strength. Antimo Caputo Pizzeria 00 flour (often seen as “the standard”) and Polselli Classica (another fantastic Italian flour) are both 260-280.
So 390-400 is very high!
** Ash? I don’t want ash in my flour!
Flour also has an ash rating, which measures how much ash remains when the flour is burnt. The more refined and processed the flour, the lower the ash content. Higher values come when the bran and wheat germ are less “forensically” separated. So, higher ash values will come from whole wheat (especially an artisan stone-milled variety), and lower values will come from the kind of flour in ultra-white grocery store bread.
I’m not an expert here, but from my experience, higher (up to 1%) can benefit longer fermentations because it moderates the acidity that results from a long ferment. 0.55% seems to be pretty near the standard for good-quality white flour.
Where Do I Get Tony’s Flour?
Although Central Milling does sell some of its products on Amazon, this isn’t one that appears to be regularly available. Unless you buy some from a Slice House in your area, you’ll probably have to order it online from Central Milling. There is no free shipping, so you may want to get a couple of bags. I also highly recommend their Organic Type 00 Reinforced for making Neapolitan pizza dough with longer fermentation times.
What Pizza Recipe Are We Making With This Flour?
The Pizza Bible: Master Dough Recipe
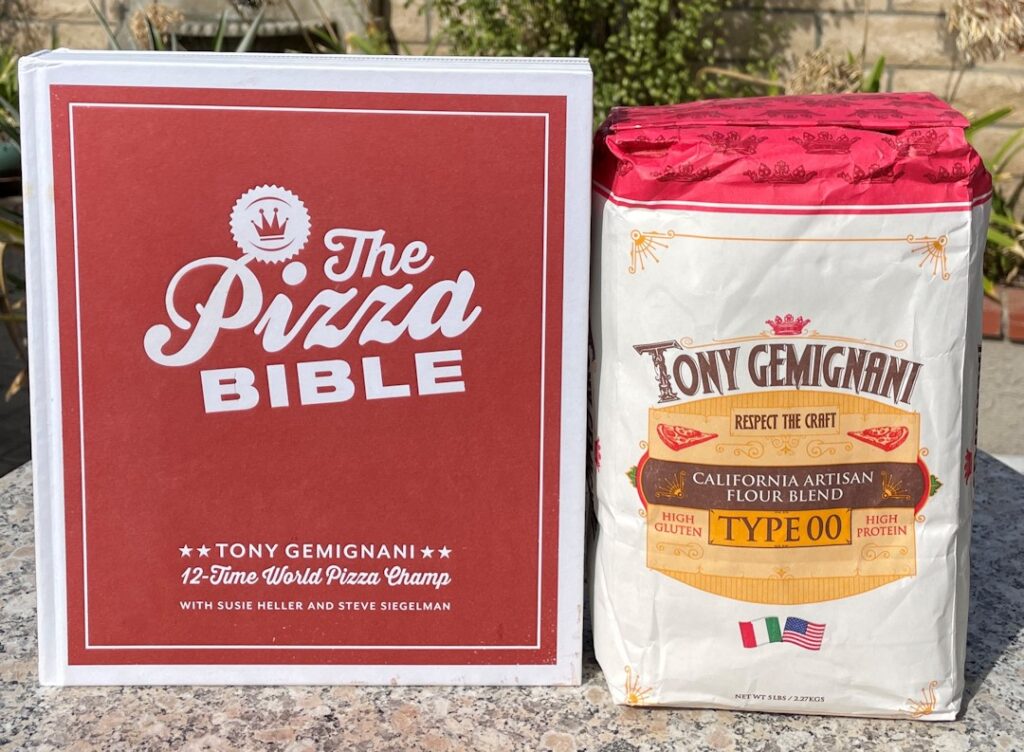
When we went to Pizza City Fest in April 2023, we heard a lot of talk from master pizzaiolos about “The Pizza Bible.” So, of course, we had to have this reference manual for trying out some of the most celebrated pizzas.
The Pizza Bible Master Dough Recipe has two variations: with or without a pizza starter. We are generally fans of Biga pizza dough, but the Tony Gemignani pizza recipe specifies using Poolish.
Who are we to argue with the 13x world champion??
Copycat: The Pizza Bible Master Dough Recipe with Starter
(Note that the without starter recipe is also posted below designed for making either 2 x 12″ dough balls or one Detroit pizza)
To quote Tony, “This is what I’d call the quintessential American pizza dough, inspired by New York-style pizza…”
Ingredients You’ll Need for this Tony Gemignani Pizza Dough Recipe (Copycat)
(These are copied from Tony’s Pizza Bible – pages 44-45)
- 2.2 grams (3/4 teaspoon) active dry yeast
- 70 grams (1/4 cup plus 1 tablespoon) of warm water (80°F to 85°F)
- 453 grams (3 1/2 cups) of flour
- The book lists several flour options. I have used the Tony Gemignani flour, which isn’t listed in the book.
- 10 grams (1 tablespoon plus 1/4 teaspoon) of diastatic malt
- I did not use this ingredient because the pizza was cooked in an outdoor pizza oven (as per his instructions).
- You should use this if cooking in an indoor, conventional oven.
- 210 grams (3/4 cup plus 2 tablespoons) of ice water, plus more as needed
- I did not need any more, largely because of the pretty high humidity where we live
- 90 grams of Poolish or what he calls “Tiga”, which is very similar to Biga.
- I learned how to make Poolish from the Pizza Bible, so our instructions are basically the same.
- 10 grams (2 teaspoons) fine sea salt
- 5 grams (1 teaspoon) extra virgin olive oil
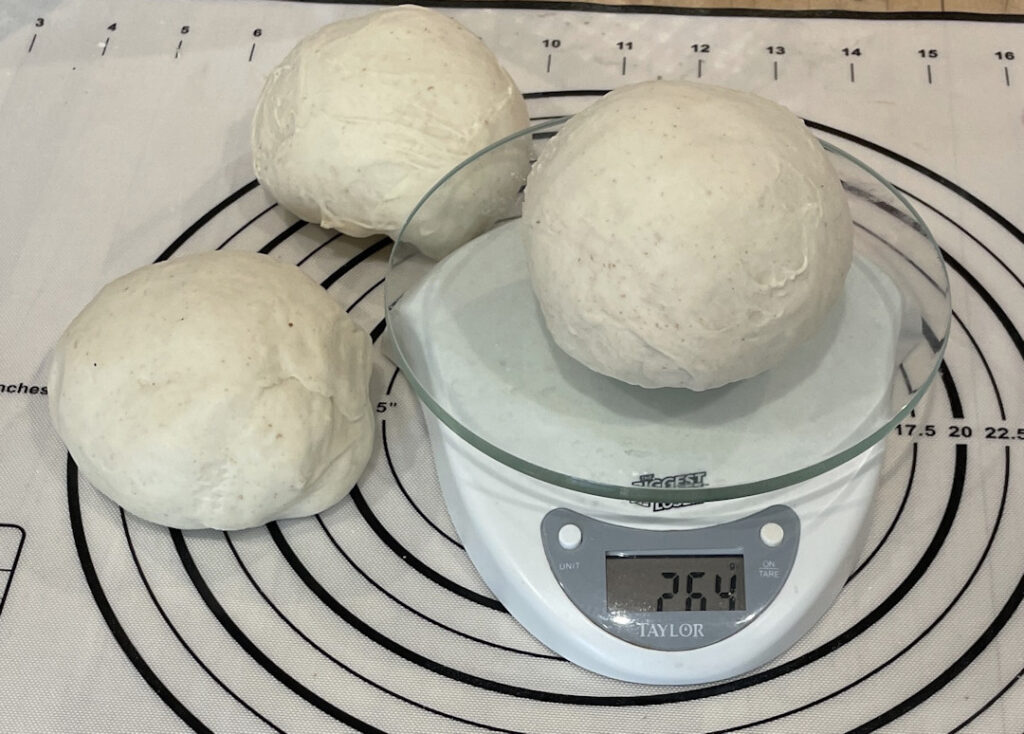
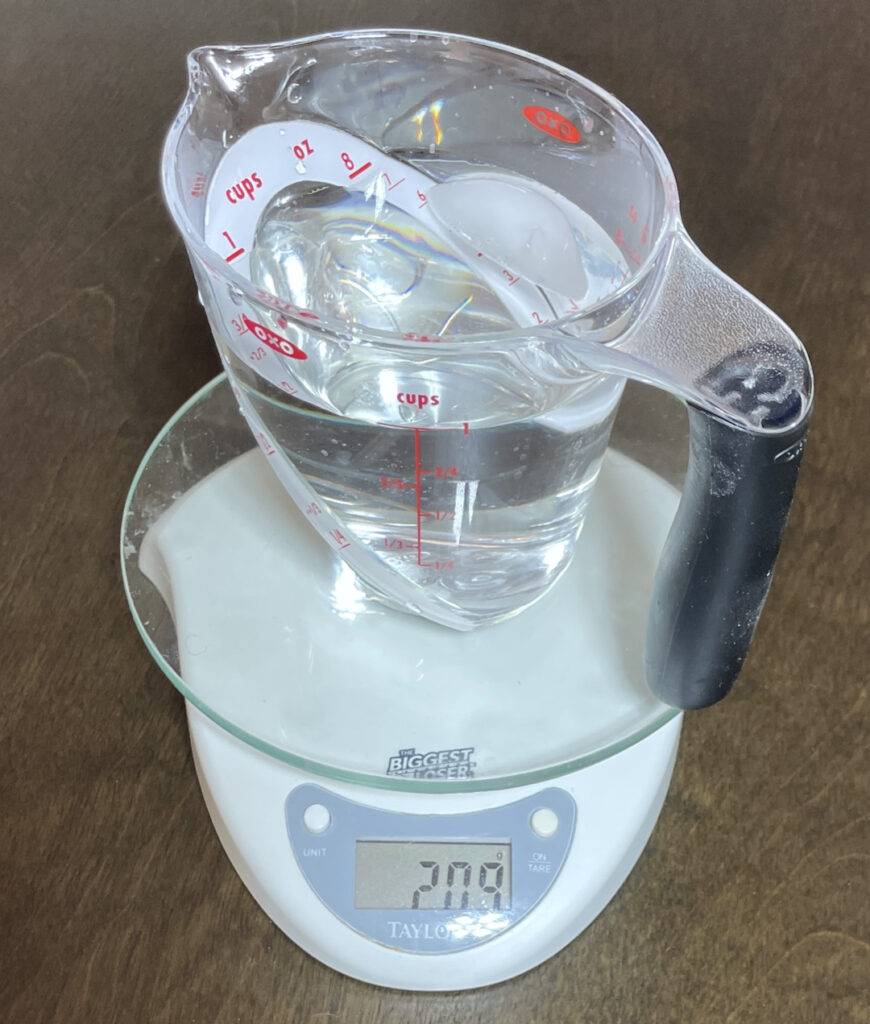
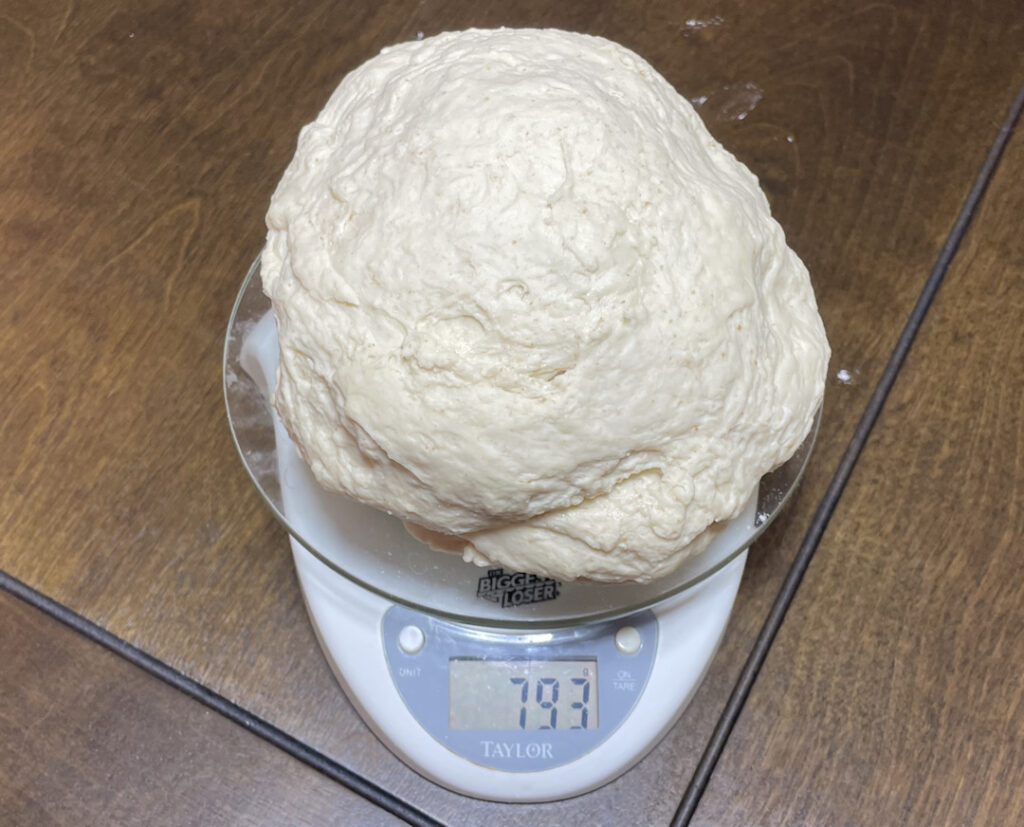
Once I finished this recipe, I realized it made a very substantial 793 grams or 28 ounces of dough. That’s A LOT! It made enough for 3x 9-ounce dough balls – roughly equivalent to 3x 12″ pizzas.
Starter or No Starter
The Pizza Bible also includes a recipe for this dough without a starter. The recipe card below shows the steps to do this. However, because of the extra steps and time required, you’re just better off making a starter and using it.
Besides, pizza starters are easy and great in many dough recipes!
How to Make Tony Gemignani Pizza Recipe
The instructions below effectively paraphrase Tony’s master dough recipe. I recommend you check out his book to learn more about this (and his many other) recipe. I’ve gotten a lot of inspiration from The Pizza Bible!
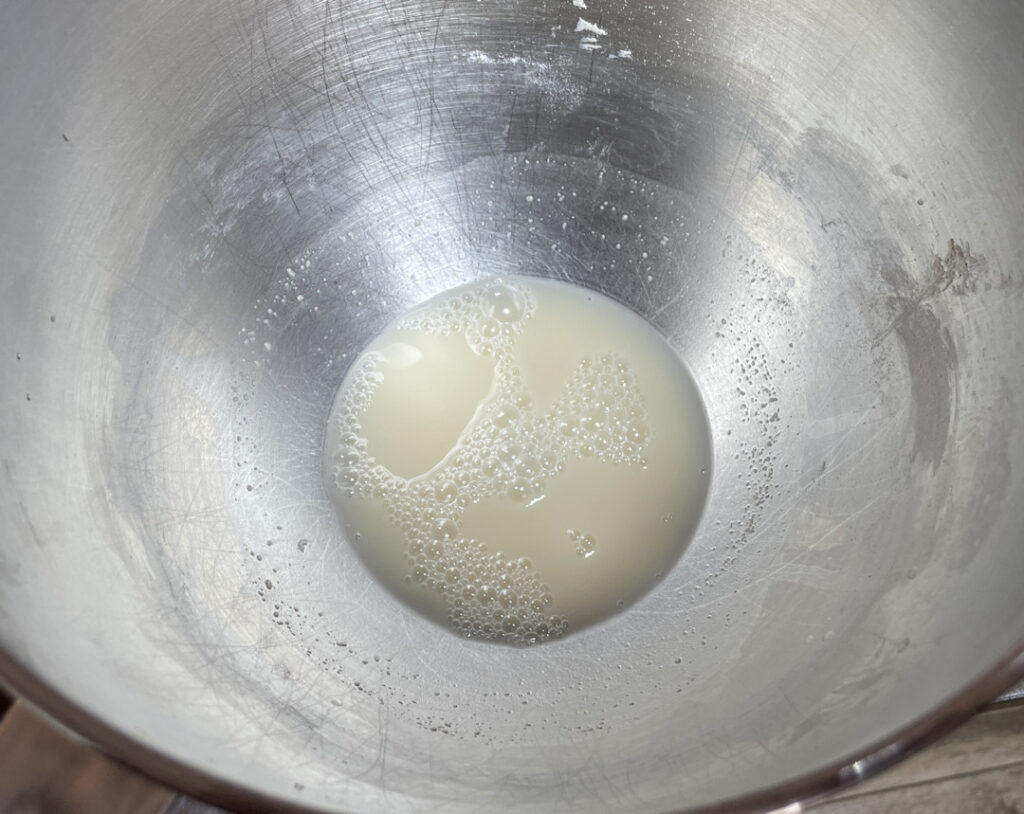
- Warm the small portion of water to 80°F to 85°F and add it to your stand mixer bowl.
- Add the yeast and whisk for 30 seconds. The yeast should dissolve and bubble – if it doesn’t, it is dead, and you need new yeast.
- Add the flour and the malt (if you’re using it) to the mixing bowl and start the stand mixer with a dough hook attachment at the lowest speed.
- Slowly add almost all the ice water while the mixer continues to spin at the slowest setting for about 15 seconds. Reserve about 2 tablespoons of water for the moment.
- Stop the mixer and add the Poolish (or Biga or Tiga – or even sourdough starter if you are so inclined).
- Restart the stand mixer at the slowest speed for 1 minute.
- Stop the mixer, wet your hands, pull the dough off the hook, and manually mix any large bits of dough stuck to the bowl into the main dough ball. You may want to use a dough scraper or spatula, but I generally use my fingers.
- If the dough feels dry and isn’t staying together in one ball, rewet your hands and knead the water from your hands into the dough.
- Add the salt to the dough and restart the mixer at the slowest speed for another minute.
- Stop the mixer and manually reform the dough ball.
- Add 1 teaspoon of oil to the dough and restart the mixer for 2 minutes. You’ll likely stop the mixer a couple of times to ensure the dough ball is being mixed and not just “going for a ride” on the dough hook.
- Note that at this point, I felt the dough was getting really warm and firm, and I was putting a strain on our stand mixer. I, therefore, stopped using the mixer and finished kneading by hand. The next step says to need it manually for 2-3 minutes, so I doubled the amount of time I was hand-kneading my dough.
- Transfer the dough from the mixing bowl to a clean, unfloured work area. The dough should not be overly dry so it stays together while kneading (otherwise, wet your hands and work the moisture into the dough), but it should also not pull itself apart by sticking to the work surface (in which case you’ll need to dust the dough with a little more flour and work it in).
- Knead by hand for 2-3 minutes until the dough is smooth.
- Note that the dough did not become smooth for me at this point, but it did after the next step.
- Cover with a damp cloth or tea towel for 20 minutes.
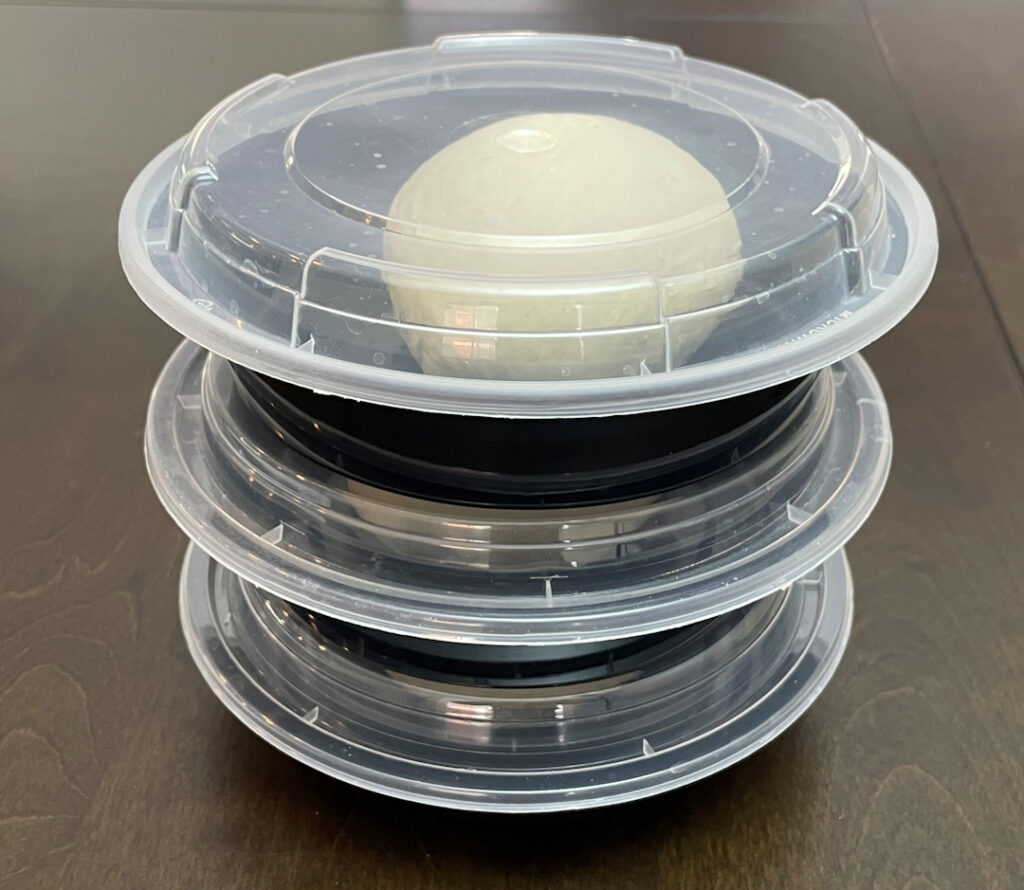
- Separate the dough into 3x 9 ounce pieces and form into balls. Place the dough balls into an air tight container at least 3″ apart and store them in the fridge for 24 to 48 hours.
What’s With the Ice Water?
The Pizza Bible is the first place I saw the suggestion of using ice water in a dough recipe. I looked it up, and apparently, it helps keep the dough cold during the mixing. Normally, the friction of the dough being kneaded (especially in a mixer) heats the dough (especially true of this recipe with this flour).
Using ice water allows the yeast to ferment more slowly while refrigerating. This adds to the complexity of the fermentation flavors and should result in a “Goldilocks” amount of air in the dough.
Master Dough Cooking Instructions
The Pizza Bible offers multiple recipes using this Master Dough recipe:
- New York-Style Pizza
- New Jersey Tomato Pie
- Detroit-Style Pizza
- St. Louis Style
- New Haven-Style ‘Apizza’
Therefore, I’m sure you’ll guess there are multiple ways of cooking the dough, too. Check out our post on each of these for more info on how to cook them.
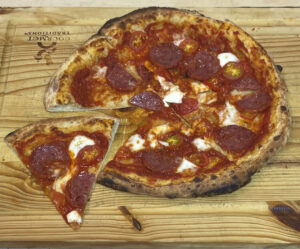
New York Master Dough Cooking Instructions…
…Satisfying Slice Style!
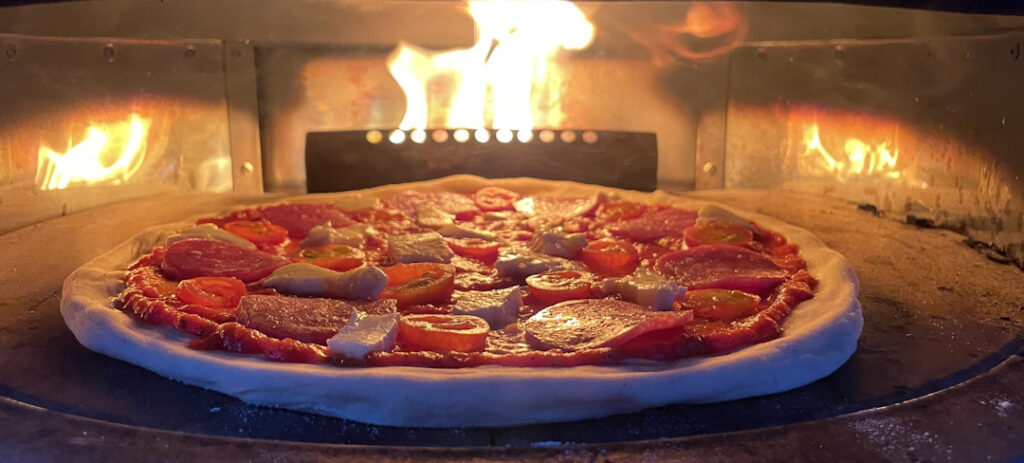
Here, we will cover Tony’s recipe for New York-style pizza in our Solo Stove Pi pizza oven. In other words, it’s none of the above.
Our cooking instructions for using this pizza dough in an outdoor pizza oven:
- Remove the pizza from the fridge and let it warm in the sealed container at room temperature until ~60°F.
- At this time, preheat your outdoor pizza oven, which will generally take 30+ minutes, depending on whether you use wood or propane.
- This pizza dough works best between 500°F and 650°F, so heat the pizza oven until it reaches about 625°F, which for many pizza ovens is rather low.
- The ideal temperature for the dough before cooking is 65°F, but it’s more important that the pizza oven is at the right temperature.
- Dust your work area and also your pizza peel with Tony’s “Dusting Mixture”:
- A 50/50 combination of the flour used in the pizza (Tony Gemignani Flour) and fine semolina flour.
- If you don’t have semolina flour, you might want to use any fairly coarse flour (even whole wheat).
- You can also use 2 parts flour and 1 part cornmeal. But if you use cornmeal, do not flip the dough over—you don’t want the cornmeal under the toppings.
- Using your fingers or a dough cutter, lift the dough ball away from the bottom of the container. Tony recommends wetting the dough cutter to get underneath if the dough is very sticky. I generally dust my hands in flour and gently lift it with my fingers.
- Transfer your dough to the dusted work surface as gently as possible – try hard not to distort the shape.
- This will best preserve the gluten structure you’ve developed.
- Don’t let the edges of the dough droop too much.
- The last thing you want to do is re-ball the dough after transferring it to the dusted surface, as that will put the coarse flour (or cornmeal) into the middle of the dough.
- If there are large air bubbles in the dough, pinch them with your fingers to pop them.
Tony Gemignani’s Dough Stretching Method
(Also from The Tony Gemignani Pizza Bible)
This method is not for the faint of heart! It takes practice and patience. Maybe that’s why the recipe above makes 3 pizzas – you’re likely to mess at least one up!
My best advice (and also Tony’s) is not to try too hard to make it super thin or worry about it being perfectly round if you’re at risk of tearing the dough. Stop when you think a tear will happen, and just make a great pizza!
- Dust your hands with only the Tony Gemignani flour.
- Press your hands into the center of the dough, trying to leave about an inch of a ring around the outside. You want to make an impression in the center but leave a 3/4″ lip.
- Tony’s trick is to stretch the outside of the dough circle and let the middle naturally stretch.
- Stretch your hands 1″ to 2″ apart from each other.
- Rotate the dough a little (10 degrees) and repeat.
- At this point, you should be able to make a 10″ disk with a 9-ounce dough ball.
- If more air bubbles have formed in the outer ring, you’ll want to pinch them (unless you like them to get charred).
- Now that the dough has been opened, it will get tricky!
- Lay the dough across the open palm of one hand.
- Gently flip it onto the open palm of the other hand.
- Rotate the dough a little and repeat “a few more times.” I think 6 is as high as you should go!
- The more gently you do this step, the more tender the final crust will be.

- And even more tricky!
- Drape the dough over your two loosely clenched fists with your fingers facing each other.
- Move your fists apart a little (maybe 1″) and toss the dough up with both fists to turn it slightly.
- You’re NOT THROWING the dough in the air like on TV! Just an inch in the air so that it will turn.

- When the dough is thin enough to see light through it, you’ve stretched it enough. The pizza disk is probably 12″ to 13″ in diameter, as big as the Solo Stove Pi can accept.
- Gently transfer to the pizza peel.
- Top your pizza with your favorite topping combination.
Cooking Tony Gemignani Pizza Recipe in the Pizza Oven

- Cook in your outdoor pizza oven between 600°F to 650°F.
- The pizza will take 5-6 minutes to cook, but monitor throughout.
- Rotate a quarter turn 4 times.
- Rest for 5 minutes before cutting, and eat immediately.
Alternative: Cooking in a Conventional Indoor Oven
Of course, you can also cook this pizza dough in an indoor oven. I would recommend using a pizza screen if you have one since this best approximates the texture of a New York pizza.
- Oil the pizza screen or pizza pan.
- Oil your hands and gently transfer it to the screen/pan.
- You can gently adjust the shape of the dough by lifting it, but be careful – if you press it or overwork it, you’ll push the dough into the holes of the screen, and it will stick.
- Cook at 500°F on a pizza screen (or in a pizza pan)
- 8 minutes, then rotate
- 8 minutes, then use a spatula to transfer the pizza to the pizza stone
- The top of the pizza should already be browning, in which case, turn the oven off.
- Leave in the oven for 5 extra minutes
- Remove and rest for 5 minutes before cutting, and eat immediately.
My Experience With Tony Gemignani’s Pizza Dough Recipe
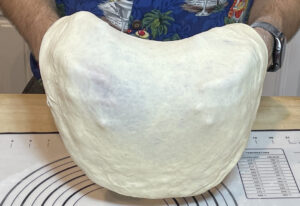
Truth be told, I was pretty skeptical when I was mixing the dough. It was EXTREMELY stiff. I was getting worried our trusty KitchenAid would burn out, so I finished kneading by hand. Despite using ice water, the dough was very warm from the kneading friction in the stand mixer.
The texture at the end of the mix was also not smooth. Even though he says this is normal, I was getting worried!
However, after the 20-minute proof at room temperature, the dough came together.
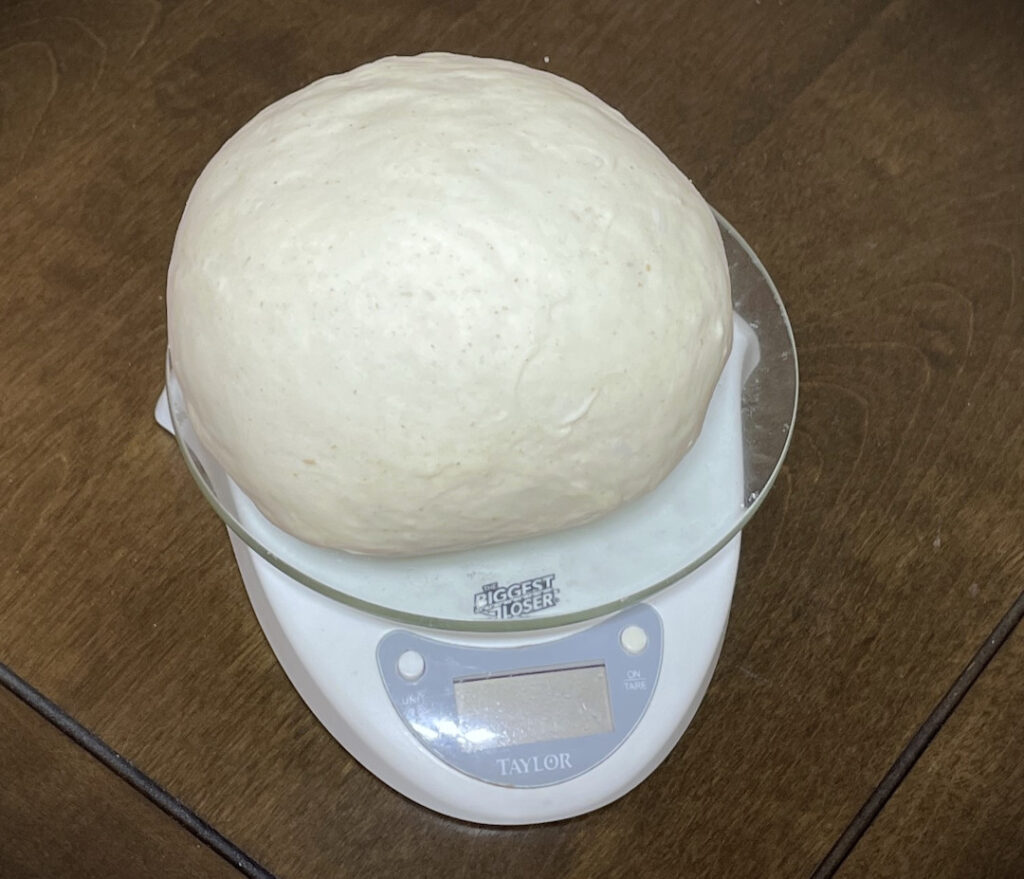
I separated it into three dough balls, each 9 ounces. Although having a recipe for three pizza doughs didn’t seem ideal, it did allow me to do my next experiment: varying the proofing time.
Varying Proofing Time
The recipe suggests proofing in the refrigerator for 24 to 48 hours. Personally, I like the flavor of a longer proofing time, so the plan was to do 1 day, 2 days, and 3 days for my three dough balls. However, 24 hours in, I could tell it wasn’t as developed as I prefer, so I waited an extra day for the first pizza.
In Conclusion

Tony Gemignani’s California Artisan Type 00 Pizza Flour is more than just a basic ingredient in a basic pizza; it’s a testament to the dedication and expertise of one of the world’s most renowned pizza chefs working with an expert milling company to produce a flour that’s suitable for professional pizzaiolos and home chefs.
Its unique blend can elevate pizzas of many American styles, from thin New York to thick Detroit to top-notch culinary experiences.
Whether you’re a seasoned pizzaiolo or a home cook eager to craft the perfect pizza, I encourage you to try Tony Gemignani flour and experience it yourself. You won’t go wrong checking out the Tony Gemignani Pizza Bible, either! So, preheat your ovens and get ready to experience pizza-making like never before!

The Pizza Bible Master Dough Recipe with Starter
Equipment
- 1 Stand Mixer Optional
- 1 Dough Scraper (Or spatula)
Ingredients
- ¾ teaspoons active dry yeast
- 2 ½ ounces water between 75°F and 80°F
- ¼ cup warm water between 100°F and 110°F
- 3 ½ cups Tony Gemignani Flour (High protein, high gluten flour)
- 1 tbsp diastatic malted barley powder (not required if using a high temp pizza oven)
- 7 ounces water ice cold
- 3 ounces Poolish (Biga or Sourdough starters are suitable substitutes)
- 2 teaspoons salt fine grain, sea salt preferred
- 2 tablespoons olive oil extra virgin
Instructions
- If you don't already have a pizza starter (Poolish, Biga, our Sourdough), you need to make it 1 day in advance.


Day 1 – Making the Dough
- Warm the small portion of water to 80°F to 85°F and add it to your stand mixer bowl.
- Add the yeast and whisk for 30 seconds. The yeast should dissolve and bubble – if it doesn’t, the yeast is dead and you need new yeast.
- Add the flour and the malt (if you’re using it) to the mixing bowl and start the stand mixer with a dough hook attachment on the lowest speed setting.
- Slowly add almost all of the ice water while the mixer continues to spin at the slowest setting for about 15 seconds. Reserve about 2 tablespoons of water for the moment.
- Stop the mixer and add the Poolish (or Biga or Tiga – or even sourdough starter if you are so inclined).
- Restart the stand mixer at the slowest speed for 1 minute.
- Stop the mixer, wet your hands and pull the dough off the hook and manually mix any large bits of dough stuck to the bowl into the main dough ball. You may want to use a dough scraper or spatula for this, but I generally just use my fingers.
- If the dough feels dry and isn’t staying together in one ball, rewet your hands and knead the water from your hands into the dough.
- Add the salt to the dough and restart the mixer at the slowest speed for another minute.
- Stop the mixer. Manually reform the dough ball.
- Add 1 teaspoon of oil to the dough and restart the mixer for 2 minutes. You’ll likely stop the mixer a couple of times to make sure the dough ball is actually being mixed and not just “going for a ride” on the dough hook.
- Transfer the dough from the mixing bowl to a clean, unfloured work area. The dough should not be overly dry so it stays together while kneading (otherwise wet your hands and work the moisture into the dough) but it is also not pulling itself apart by sticking to the work surface (in which case you’ll need to dust the dough with a little more flour and work it in).
- Knead by hand for 2-3 minutes until the dough is smooth.
- Cover with a damp cloth or tea towel for 20 minutes.
- Separate the dough into 3x 9 ounce pieces and form into balls. Place the dough balls into an air tight container at least 3″ apart and store in the fridge for 24 to 48 hours.


Day 2 (or 3):
Transfer the Dough to your Work Surface: Tony Gemignani's Method
- Remove the pizza from the fridge and let warm in the sealed container at room temperature until ~60°F.
- At this time, preheat your outdoor pizza oven, which generally will take 30+ minutes depending on if you use wood or propane.
- Dust your work area and also your pizza peel with Tony’s “Dusting Mixture”:– A 50/50 combination of the flour used in the pizza (Tony Gemignani Flour) and fine semolina flour.– If you don’t have semolina flour, you might want to use any fairly coarse flour (even whole wheat).– You can also use a 2 parts flour to 1 part cornmeal. But if you use cornmeal, do not flip the dough over – you don’t want the cornmeal under the toppings.
- If there are large air bubbles in the dough, pinch them with your fingers to pop them.
- Using your fingers or a dough cutter, lift the dough ball away from the bottom of the container. If the dough is very sticky, Tony recommends wetting the dough cutter to get underneath. I generally dust my hands in flour and gently lift it with my fingers.
- Transfer your dough to the dusted work surface as gently as possible – try hard not to distort the shape.


Stretch the Dough: Tony Gemignani's Method
- Dust your hands with only the Tony Gemignani flour.
- Press your hands into the center of the dough trying to leave about an inch ring around the outside. You want to make an impression in the center but leave a 3/4″ lip.
- Flip the dough between your hands:– Lay the dough across the open palm of one hand.– Gently flip it onto the open palm of the other hand.– Rotate the dough a little and repeat “a few more times”. I think 6 is as high as you should go!– The more gently you do this step, the more tender the final crust will be.
- Stretch the dough by draping it over your hands and rotating:– Drape the dough over your two loosely clenched fists with your fingers facing each other.– Move your fists apart a little (maybe 1″) and toss the dough up with both fists to turn it slightly.– You’re NOT THROWING the dough in the air like on TV! Just an inch in the air so that it will turn.
- When the dough is thin enough to see light through it, you’ve stretched it enough. The pizza disk is probably 12″ to 13″ in diameter.


Prepare to Cook the Pizza: Satisfying Slice Style!
- Ensure your pizza oven is between 600°F to 650°F.
- Gently transfer to the pizza peel, which has been dusted with flour.
- Top with your favorite toppings.
- Launch the pizza into the oven.
- The pizza will take 5-6 minutes to cook, but monitor throughout. Rotate a quarter turn 4 times.
- Rest for 5 minutes before cutting and eat immediately.


Notes
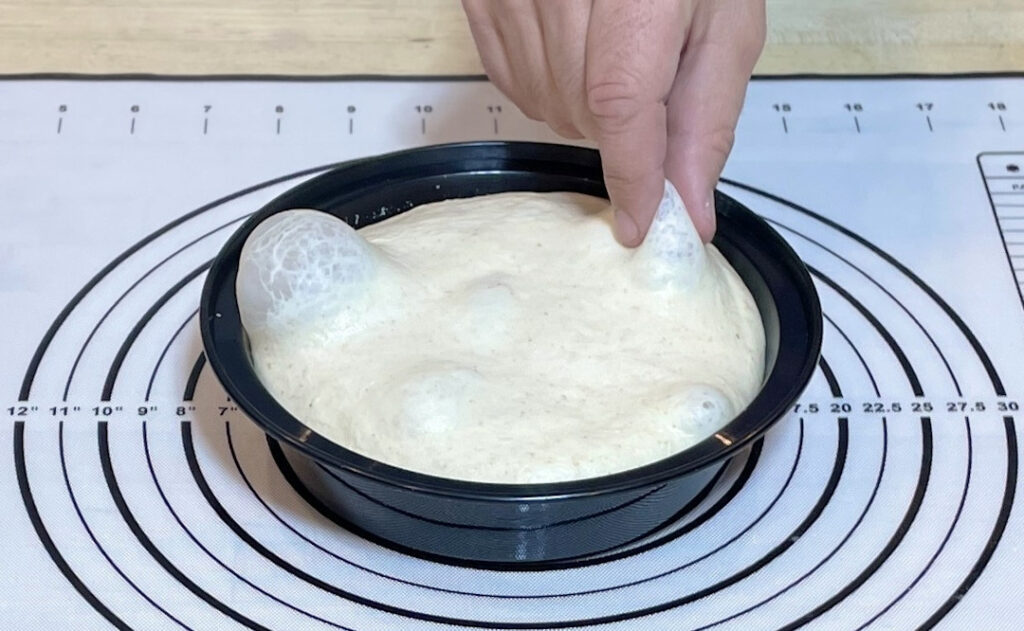
- Instead of resting the dough for 20 minutes, increase the resting time to 1 hour.
- Press the dough down and wet the dough ball.
- Seal in an air tight container and refrigerate for 24 hours.
- Return the dough to the stand mixer and mix for 30 seconds on the lowest speed to remove the air from the dough.
- Separate into individual dough balls and seal in an air tight container with each dough ball at least 3″ apart.
- Refrigerate again for 24 to 48 hours.
Nutrition
The Pizza Bible Master Dough Recipe (no starter) – 2x 12″ pizzas
Equipment
- 1 Stand Mixer Optional
- 1 Dough Scraper (Or spatula)
Ingredients
- 1 teaspoons active dry yeast about 1 packet (3.5g)
- 3 ounces water between 80°F and 85°F (52g)
- 2.5 cups Tony Gemignani Flour (High protein, high gluten 00 flour) (335g)
- 2 teaspoons diastatic malted barley powder (not required if using a high temp pizza oven) (7g)
- 4 ounces water ice cold (167g)
- 2 tablespoons salt fine grain, sea salt preferred (7g)
- .75 teaspoons olive oil extra virgin (4g)
Instructions
Day 1 – Making the Dough
- Warm the small portion of water to 80°F to 85°F and add it to your stand mixer bowl.
- Add the yeast and whisk for 30 seconds. The yeast should dissolve and bubble – if it doesn’t, the yeast is dead and you need new yeast.
- Add the flour and the malt (if you’re using it) to the mixing bowl and start the stand mixer with a dough hook attachment on the lowest speed setting.
- Slowly add almost all of the ice water while the mixer continues to spin at the slowest setting for about 1 minute. Reserve about 2 tablespoons of water for the moment.
- Stop the mixer, wet your hands and pull the dough off the hook and manually mix any large bits of dough stuck to the bowl into the main dough ball. You may want to use a dough scraper or spatula for this, but I generally just use my fingers.
- If the dough feels dry and isn’t staying together in one ball, rewet your hands and knead the water from your hands into the dough.
- Add the salt to the dough and restart the mixer at the slowest speed for another minute.
- Stop the mixer. Manually reform the dough ball.
- Add 1 teaspoon of oil to the dough and restart the mixer for 2 minutes. You’ll likely stop the mixer a couple of times to make sure the dough ball is actually being mixed and not just “going for a ride” on the dough hook.
- Transfer the dough from the mixing bowl to a clean, unfloured work area. The dough should not be overly dry so it stays together while kneading (otherwise wet your hands and work the moisture into the dough) but it is also not pulling itself apart by sticking to the work surface (in which case you’ll need to dust the dough with a little more flour and work it in).
- Knead by hand for 2-3 minutes until the dough is smooth.
- Cover with a damp cloth or tea towel for 1 hour.
- Split into 2 equal 10 oz. dough balls. This dough ball will be the right size for 2 round 12" pizzas.
- Lightly flour the exterior of the dough balls and place into an air tight container (or two) at least 3″ apart and store in the fridge for 24 hours.
Day 2:
Transfer the Dough to your Work Surface: Tony Gemignani's Method
- Remove the pizza from the fridge and let warm in the sealed container at room temperature until ~60°F.
- At this time, preheat your outdoor pizza oven, which generally will take 30+ minutes depending on if you use wood or propane.
- Dust your work area and also your pizza peel with Tony’s “Dusting Mixture”:– A 50/50 combination of the flour used in the pizza (Tony Gemignani Flour) and fine semolina flour.– If you don’t have semolina flour, you might want to use any fairly coarse flour (even whole wheat).– You can also use a 2 parts flour to 1 part cornmeal. But if you use cornmeal, do not flip the dough over – you don’t want the cornmeal under the toppings.
- If there are large air bubbles in the dough, pinch them with your fingers to pop them.
- Using your fingers or a dough cutter, lift the dough ball away from the bottom of the container. If the dough is very sticky, Tony recommends wetting the dough cutter to get underneath. I generally dust my hands in flour and gently lift it with my fingers.
- Transfer your dough to the dusted work surface as gently as possible – try hard not to distort the shape.
Stretch the Dough: Tony Gemignani's Method
- Dust your hands with only the Tony Gemignani flour.
- Press your hands into the center of the dough trying to leave about an inch ring around the outside. You want to make an impression in the center but leave a 3/4″ lip.
- Flip the dough between your hands:– Lay the dough across the open palm of one hand.– Gently flip it onto the open palm of the other hand.– Rotate the dough a little and repeat “a few more times”. I think 6 is as high as you should go!– The more gently you do this step, the more tender the final crust will be.
- Stretch the dough by draping it over your hands and rotating:– Drape the dough over your two loosely clenched fists with your fingers facing each other.– Move your fists apart a little (maybe 1″) and toss the dough up with both fists to turn it slightly.– You’re NOT THROWING the dough in the air like on TV! Just an inch in the air so that it will turn.
- When the dough is thin enough to see light through it, you’ve stretched it enough. The pizza disk is probably 12″ to 13″ in diameter.
Prepare to Cook the Pizza: Satisfying Slice Style!
- Ensure your pizza oven is between 600°F to 650°F.
- Gently transfer to the pizza peel, which has been dusted with flour.
- Top with your favorite toppings.
- Launch the pizza into the oven.
- The pizza will take 5-6 minutes to cook, but monitor throughout. Rotate a quarter turn 4 times.
- Rest for 5 minutes before cutting and eat immediately.
Notes
Nutrition

Todd’s cooking skills have revolved around the grill since about age 12, when he developed a love for grilling and took over for Mom at the BBQ. He worked at Wendy’s and at Earl’s Tin Palace (a restaurant chain in Canada) but never really did any sort of baking…until he and Heather started making pizza together! Now he’s often making dough in the mornings and pizza in the evenings.