Usually, around here, we’re obsessed with testing a new flour in a Margherita, recreating a regional specialty pizza, or trying something wonky like chocolate on pizza.
But it’s the holiday season. And while I would happily eat pizza for Christmas dinner (or make it with leftovers like we did last year!), tradition calls for something a little different to go along side Heather’s amazing turkey!
Today, we are taking a slight detour from our usual “slices” to honor another perfect form of carb: my Grandma’s legendary dinner rolls—or as we always called them growing up, “dinner buns.”
The Hunt for the Vintage Dinner Roll Recipe
My grandma made the absolute best rolls. They were soft, slightly sweet, and the smell of them baking is basically the scent definition of “holiday comfort.”
Recently, I went on a mission to find the exact recipe she used. I knew it likely came from one of the titans of mid-century home cooking. While Better Homes and Gardens does have a current edition cookbook, I was after the old school. With the help of Google, I found it (or at least it’s how I remember it). It’s the “Basic Roll Dough” from a vintage era of the Better Homes and Gardens Cook Book (specifically around the 1968 edition).
Finding this recipe felt like striking gold. It’s the blueprint for the rolls that graced our family table for decades. And with a couple of tweaks, I’ve got how I remember helping Grandma make them!
A Modern Tweak to a Classic
The original 1968 recipe calls for shortening. Shortening was incredibly popular back then because it’s 100% fat, which guarantees a very high rise and an impossibly tender, soft crumb.
However, as much as I love nostalgia, I love flavor more.
Shortening is neutral; it brings texture, but not taste. For this version of “dinner buns,” we are swapping the shortening for good quality, unsalted butter.
Why? Because butter makes everything better!

While shortening might yield a slightly softer roll, using butter provides that rich, creamy, unmistakable flavor that makes a homemade roll truly irresistible.
(Baker’s Note: If you are a texture purist and want the absolute softest roll possible while still using butter, you can take an extra step and use clarified butter or ghee. This removes the water content, making it behave more like shortening. But honestly? Good old-fashioned stick butter works wonders here.)
Bringing This Traditional Recipe Back
This recipe does take a little time—it is a yeast dough with two rises—but the active work is minimal. The process of scalding the milk, watching the yeast bloom, and feeling the dough come to life under your hands is incredibly satisfying.
I’m thrilled to bring these back to our own holiday table this year, and I hope they become a tradition at yours, too. Let’s bake!
A Couple of Tips and Tricks
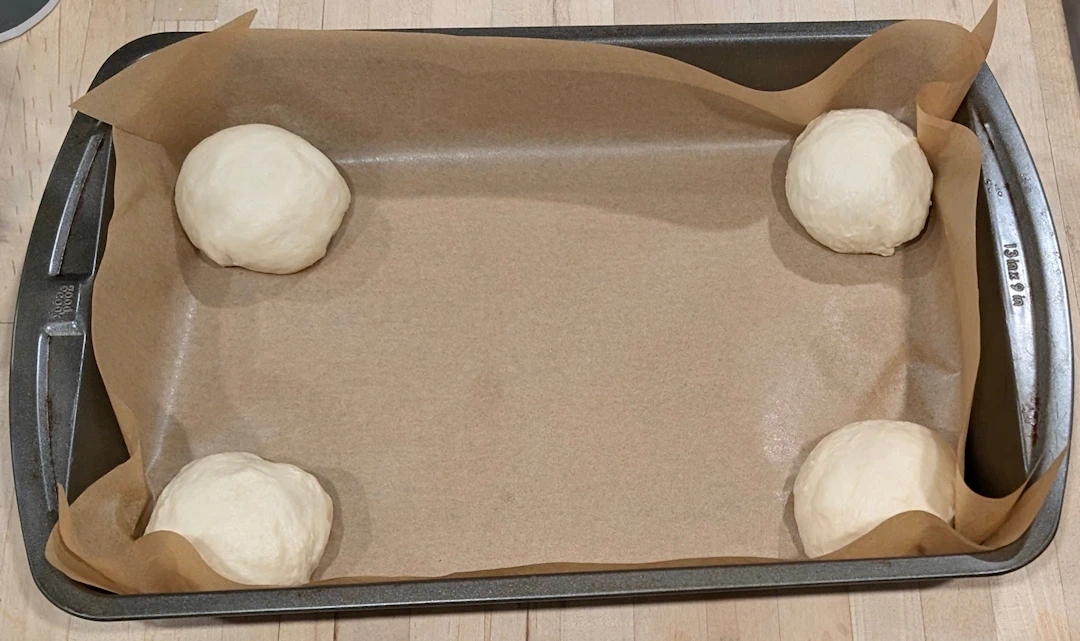
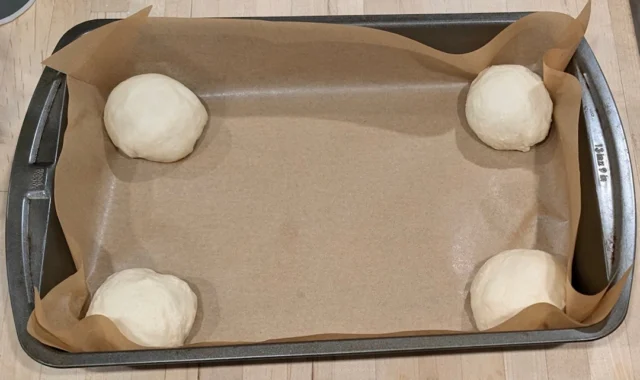
- Cut the parchment paper at the corners so it fits nicely into the pan without bunching.
- Then put a dough ball in each corner to fix it in place.
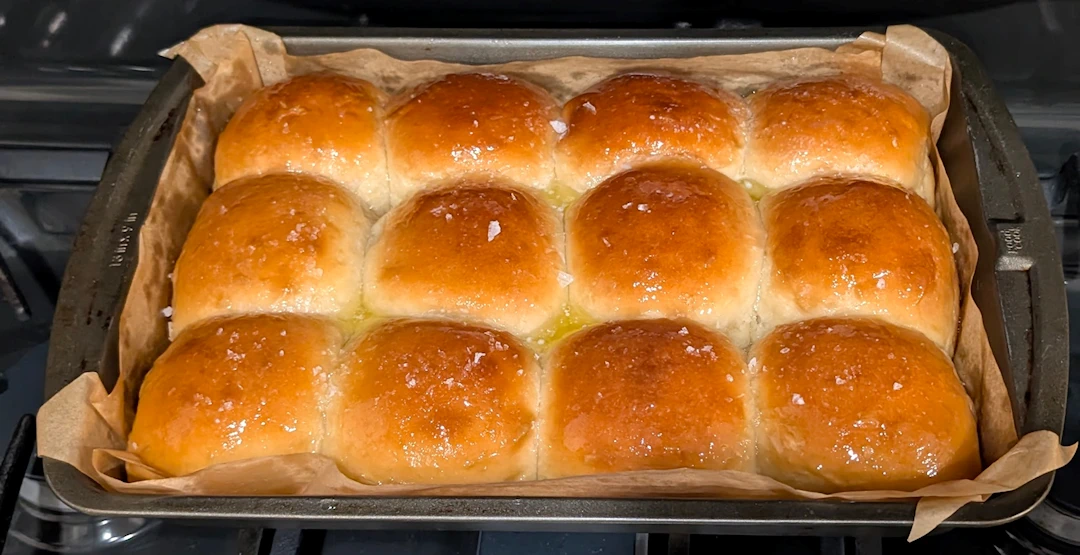
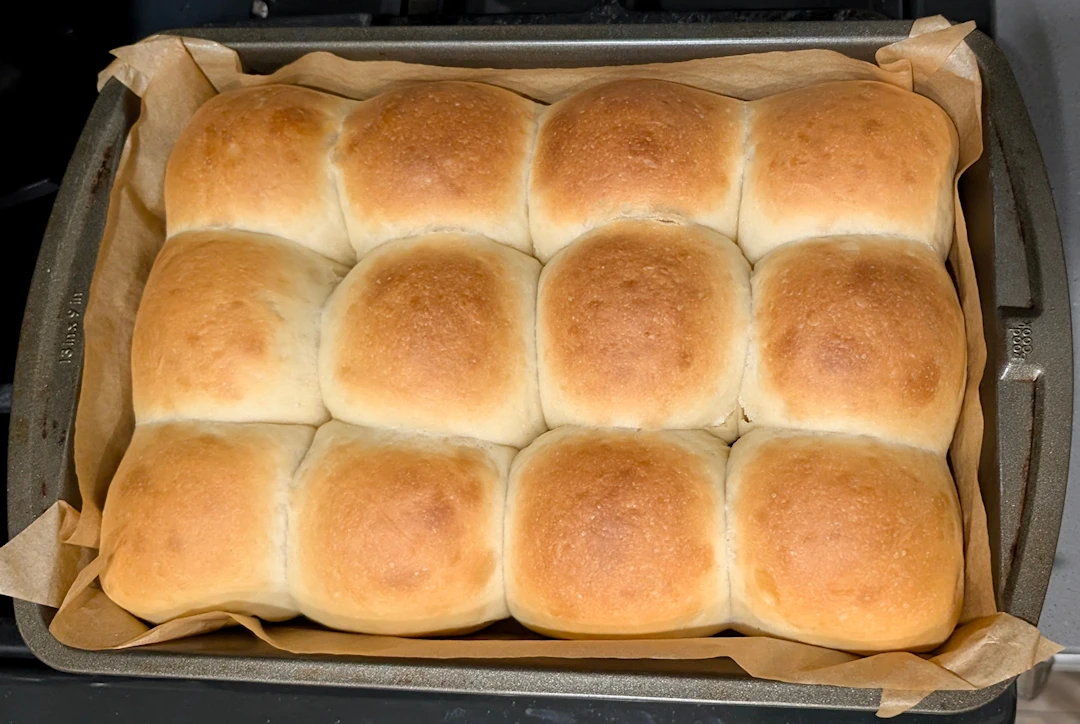
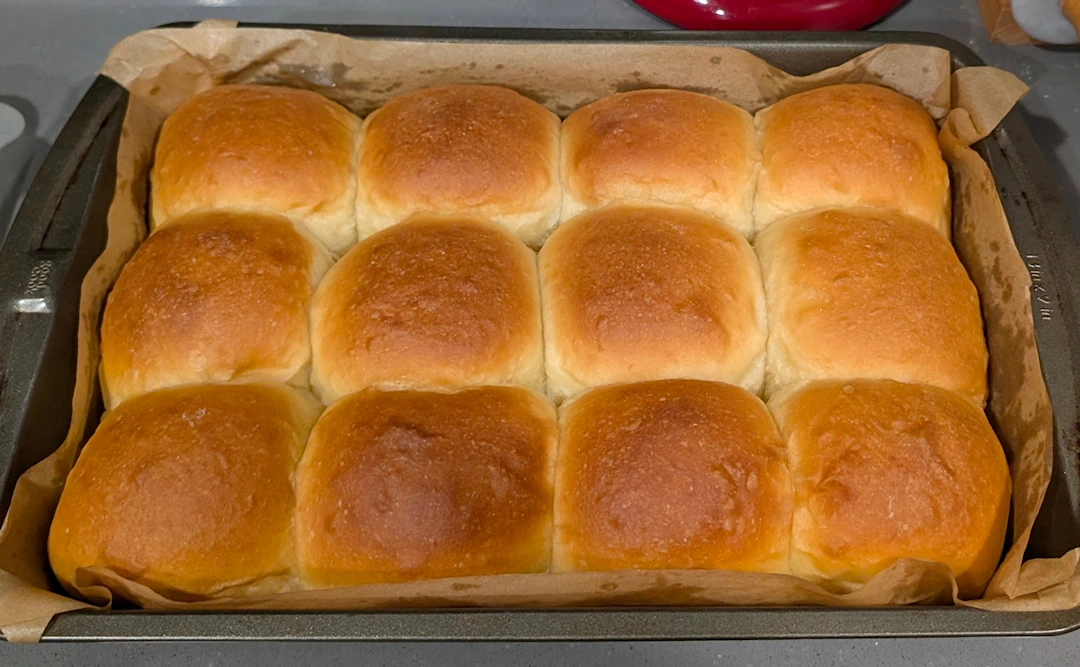
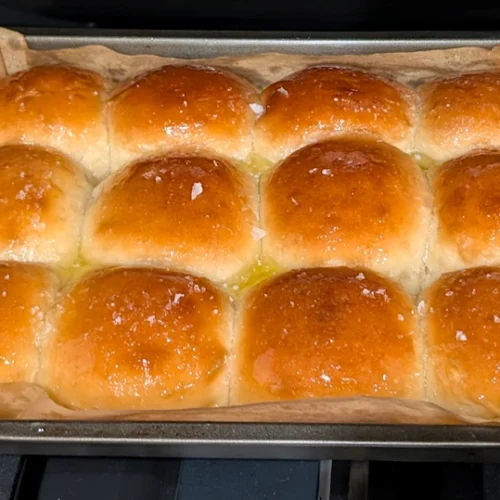
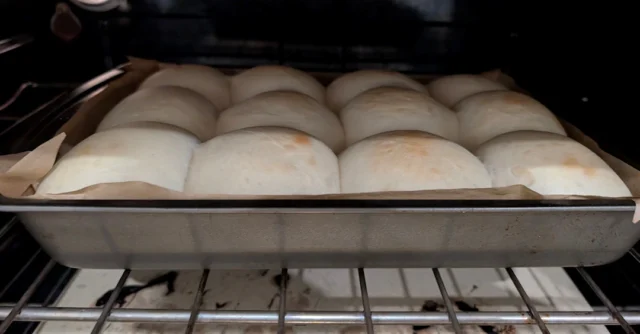
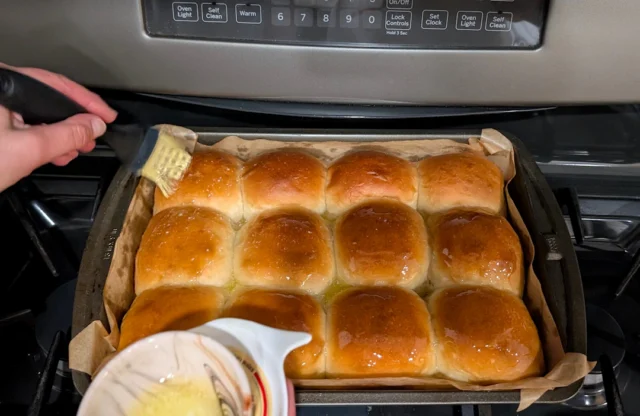
- Golden brown is sometimes unclear, so here’s a comparison between 2 versions of golden brown. The first one isn’t quite done enough. The second is perfect!
- If you’re also baking other dishes for your holiday meal, you might have to pre-bake your rolls. If that’s the case, you do want them fully baked the first time, but while your turkey is resting, you can warm up your rolls for a few minutes. Wait to baste the rolls and add salt until just before serving.
Grandma’s Vintage 1968 “Dinner Buns”
Equipment
- 1 Stand Mixer optional
- 1 9"x13" baking pan
- 1 sheet of parchment paper I like cutting the corners diagonally so that it fits the pan better.
Ingredients
- ½ cup warm water ideal temperature is 110°F / 43°C
- 1 cup whole milk
- ¼ cup unsalted butter melted and cooled
- 1 tbsp unsalted butter extra for brushing on top at the end
- 1 tbsp granulated sugar technically less than the original recipe, but I don't like my dinner rolls sweet.
- ½ tbsp salt granulated
- 1 large egg slightly beaten, room temperature
- 3 ½ cups all-purpose flour sifted
- 1 tsp salt flaked or Kosher
Instructions
Prep & Mix Ingredients
- Cut the butter into small cubes and put in the microwave on defrost to melt and allow to cool. You don't want the butter hot when you add it.Also remove an egg from the refrigerator to warm to room temperature.Pour 1 cup of milk and also allow to warm to room temperature.
- Line a 9" x 13" baking pan with parchment paper. Cut the corners from the outside towards the center about 2". This will allow the paper to sit into the pan without bunching as much.
- Bloom the yeast: In your mixing bowl, stir the yeast into the 1/4 cup of warm water and sugar. Let it stand for about 5-10 minutes until it gets foamy and bubbly.
- Stir the cooled melted butter. milk, and salt. If the butter is still warm or you scalded the milk, make sure that the mixture is not to warm (no higher than 110°F).
- Start the dough: In a large mixing bowl (or the bowl of a stand mixer), pour in the milk mixture. Add about 1 1/2 cups of the flour and begin the stand mixer on low speed.
- Crack and gently beat the egg and add to the mixing bowl. Beat well until combined.
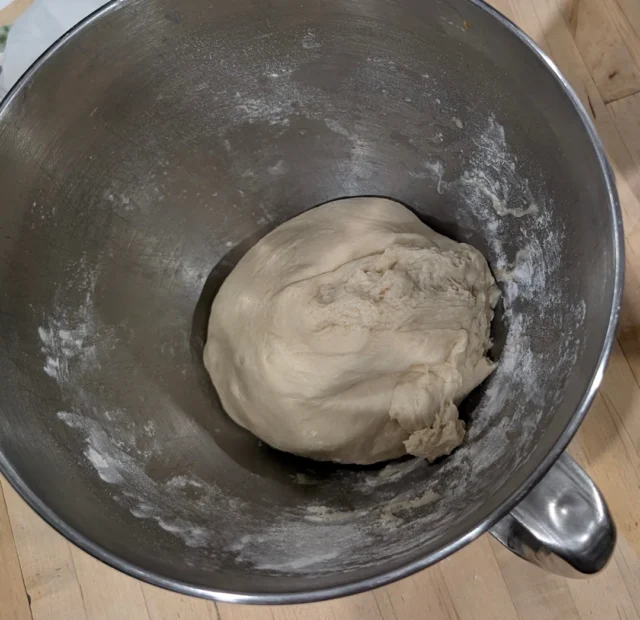
- Finish the dough: Gradually stir in enough of the remaining flour to make a soft dough. It should pull away from the sides of the bowl but still be slightly tacky.

- First Rise: Turn the dough out onto a lightly floured surface and knead gently for 3-5 minutes until smooth.
- Place the dough in a lightly greased bowl, turning it once to grease all sides of it. Cover the bowl with plastic wrap or a clean kitchen towel. Let it rise in a warm place until doubled in size (about 1 to 1.5 hours).
Shape, Ball, and Second Rise
- Shaping the rolls: Once doubled, gently punch the dough down to release air bubbles. Turn it out onto a lightly floured surface.
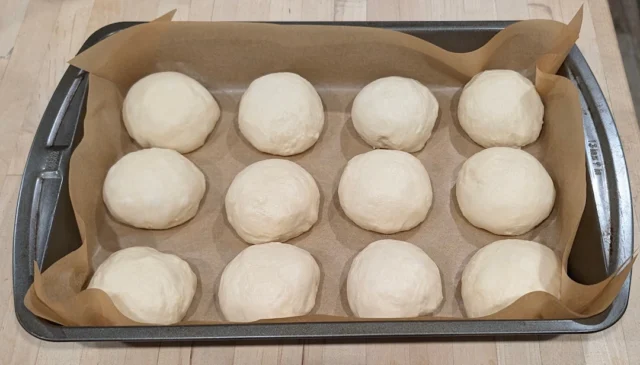
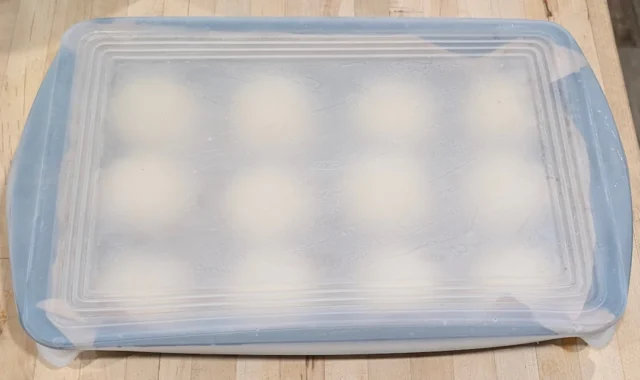
- Divide the dough into 12 equal pieces and shape them into smooth balls.
- Second Rise: Place one of the shaped rolls into each corner and get the parchment paper settled.
- Place the rest of the rolls into the baking pan, leaving a little space between them.
- Cover and let rise again until doubled in size (about 45 to 60 minutes). At this time, preheat your oven to 375°F
- Bake: Place the rolls into the oven. Be sure to rotate the pan halfway for even cooking.
- Bake the rolls for 25-30 minutes, or until the tops are golden brown
- Finish: Remove from the oven – if you have an instant read thermometer, you can check the internal temperature to be about 185°F to 190°F.
- Immediately brush the hot rolls with melted butter for a soft, shiny crust. Sprinkle the flaked salt over the top.
- Serve warm.

Notes
- Scald the Milk: You can also scald the milk (heating in a sauce pan on medium until just steaming – which will also melt the butter, but my grandma never did it like this – she didn’t want to risk killing the yeast and there weren’t instant read thermometers back then!).
- The Fat Substitution: The original 1968 recipe used shortening. We have used butter for better flavor. If you only have salted butter, reduce the added salt in the recipe to 3/4 teaspoon.
- Sweeter Option: Technically, this recipe used 1/4 cup of sugar. I like my buns (rolls) savory and not sweet, but you may choose to change this.
- Make-Ahead Option: After mixing the dough (step 6), place the greased, covered bowl in the refrigerator overnight instead of letting it rise on the counter. The next day, punch it down, shape the rolls, let them rise until doubled (this will take longer since the dough is cold), and bake.
Nutrition

Todd’s cooking skills have revolved around the grill since about age 12, when he developed a love for grilling and took over for Mom at the BBQ. He worked at Wendy’s and at Earl’s Tin Palace (a restaurant chain in Canada) but never really did any sort of baking…until he and Heather started making pizza together! Now he’s often making dough in the mornings and pizza in the evenings.