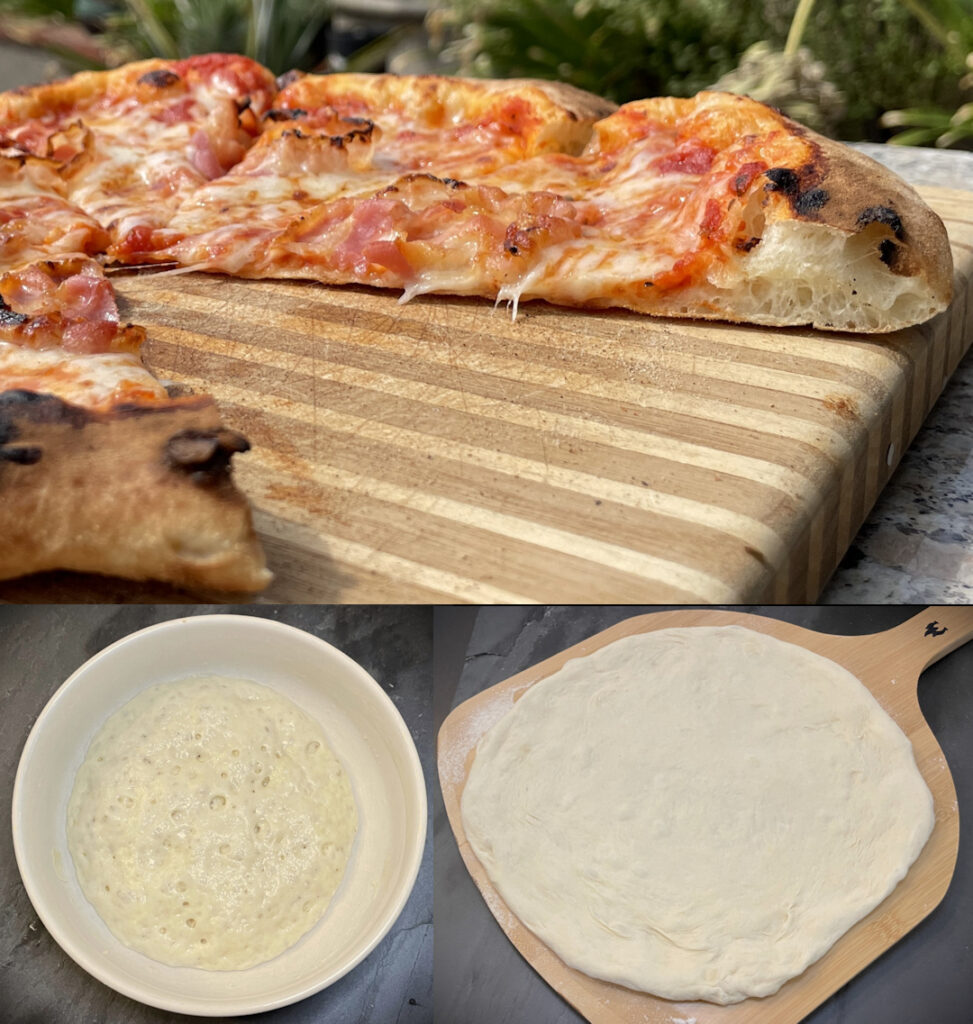
As we continue our exploration of pizza starters, it’s time to talk about my favorite: Biga. Making a lighter, airy texture crust using Biga pizza dough is an easy way to level up your pizzaiolo game!
Much like in artisan breads (think a sourdough loaf), a starter or preferment is a common way to start both breads and pizzas. Using a starter for your pizza can give it extra depth and complexity of flavor, rich texture, accelerated fermentation (which means faster proofing time), and even some digestive benefits.
Biga Pizza Dough
Biga is a bread starter that originated in Italy, predominantly for making Ciabatta and other Italian breads. The word ‘biga’ originated from the Latin term ‘bica,’ which means ‘a mixture for bread.’ Biga contributes to the bread’s distinct crust and inner texture.
Unlike the starter called Poolish, Biga has a lower hydration level. Whereas Poolish is 1 part water to 1 part flour by weight, Biga is usually 50% to 65% (again, by weight). The Biga’s lower hydration level results in a thicker, stiffer starter that requires longer fermentation – typically at least 12 hours room temperature, but often as long as two days. This is because the lower water content slows down the fermentation process – which results in the biga developing a complex flavor with a subtle sourness and contribute to a chewier texture in the final product.
It’s also easier to work with because it’s roughly the same hydration level as most pizza doughs. This removes the calculations (or more likely guesswork, if you don’t have a calculator handy) of how the Biga will affect your final dough.
If your goal is to make something akin to a sourdough pizza but without going through the process of making an actual sourdough, Biga pizza starters are the next best thing.
And in my opinion, the best payoff in flavor for the work involved from our variety of starters.
What Is Biga?
A biga (or a biga dough) is a mixture of flour, water, and a small amount of yeast. This mixture is allowed to ferment for a specific period, usually 12 to 24 hours (up to 48), before being mixed into the final dough. This pre-fermentation period allows for the development of a more complex flavor profile and improved texture in the final bread or pizza crust.
How Much Biga?
Again, because Biga is roughly the same hydration level as your final pizza, you have a lot of flexibility in the ratio of Biga you use in your dough. I’ve seen people make their dough from 100% Biga – meaning the whole dough is Biga.
However, per the “The” AVPN Pizza Recipe your starter (i.e. your Biga) has a limit to the amount that you can use: 5% to 20% of the final dough by weight.
If you are interested in learning more about using a starter in place of yeast in a Neapolitan, we have a post on that specifically.
How to Make Biga Pizza Starters

Ingredients for this Biga Pizza Dough Recipe:
- 1/2 teaspoon active dry yeast
- 20 grams (1 tablespoon plus 1 teaspoon) warm water (no higher than 110°F)
- 30 grams (1/4 cup) all-purpose flour
Biga Pizza Dough Recipe
This Biga pizza dough recipe is straight forward to make and no more difficult than any other homemade pizza recipe. You just need a little extra time!
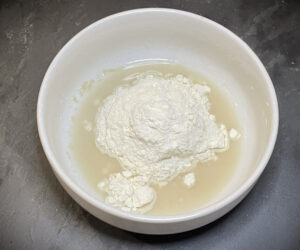
- Dissolve the yeast in the warm water and let it sit for about 5 minutes, until frothy. This activates the yeast and ensures it’s alive and active.
- After the yeast is activated, add the flour to the mixture and stir well with a butter knife until all the flour is wet and the mixture forms a thick, sticky batter. Once mixed, the dough should be dry enough you could form it by hand (although you’ll want to wet your hands so it doesn’t stick to them).
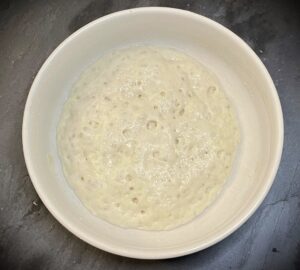
- Cover the bowl with a clean kitchen towel or plastic wrap and let the biga ferment at room temperature for at least 12 and up to 24 hours. Some bakers may let a biga ferment for up to 48 hours. The longer fermentation period will produce a more complex flavor but keep in mind that the longer fermentation time will affect the workability of the dough. Many bakers prefer a “cold ferment”, where the dough proofs longer but in the fridge to slow the process. I’ve done this for as long as 5 days. The dough seemed to be much more challenging to form but the flavor was still excellent.
After the fermentation process, your Biga starter is ready to be used in your pizza dough recipe!

How to Use Biga in Your Pizza Dough

Starter Ratios in a Biga Neapolitan Pizza Dough
Associazione Verace Pizza Napoletana (AVPN) Neapolitan dough allows for up to 20% of the dough recipe to be made with a “mother dough”, which really could be any of these (Biga is arguably the more traditional choice, being Italian, but Poolish is probably more popular today).
You will probably find it easier to work with a fairly low ratio of starter (1 part in 5 or 20% or less) because it won’t significantly change the flour/water ratio of the overall recipe (but even then you still will likely need to add a bit of extra flour, especially if the Biga ferments longer).
You can certainly use higher ratios (as high as 50%, especially if you’re trying to get a sourdough-type of flavor to come through) but you’ll almost certainly be altering the pizza dough‘s hydration level – that will likely mean you’re going to add more flour than the recipe calls for.
If you have leftovers of your Biga, you can use the remainder to start your next batch of starter, much like a sourdough starter. Left long enough, it will basically become a sourdough.
Practical Tips for Pizzaiolos Using Biga Dough
- Time Management: Biga benefits from a long fermentation period, often up to 48 hours. However if you over-ferment, the dough can become acidic (sour) and/or difficult to work with. On the other hand, Biga will already start working its magic in just a few hours, especially if stored in a warm place.
- Temperature: The temperature that you pre-ferment your starter (and later your pizza) has a significant impact on how long until your starter has had to do its work. Warmer equals faster fermentation but slower and colder is generally better for controlling the fermentation, which many bakers prefer.
- Experiment: Once you have a good handle on using a Biga, feel free to adjust the ratios, the temperatures, and the fermentation time to match your ideal pizza!
- Water: Tap water is generally fine for either of these unless your water is very hard or very soft. In that case, use filtered or bottled drinking water, the latter of which will have trace minerals added for flavor.
Biga Pizza Dough Recipes
A Biga starter can be used in pretty much any pizza dough. As mentioned, you can use a “mother dough” to make a Biga Neapolitan pizza dough. As an example, you can substitute Biga for sourdough in this recipe of ours.

Biga is also a very popular starter in Sicilian pizzas, which take longer time to ferment and benefit from using a Biga starter. We have a recipe for using Biga in a Sicilian pizza recipe here.
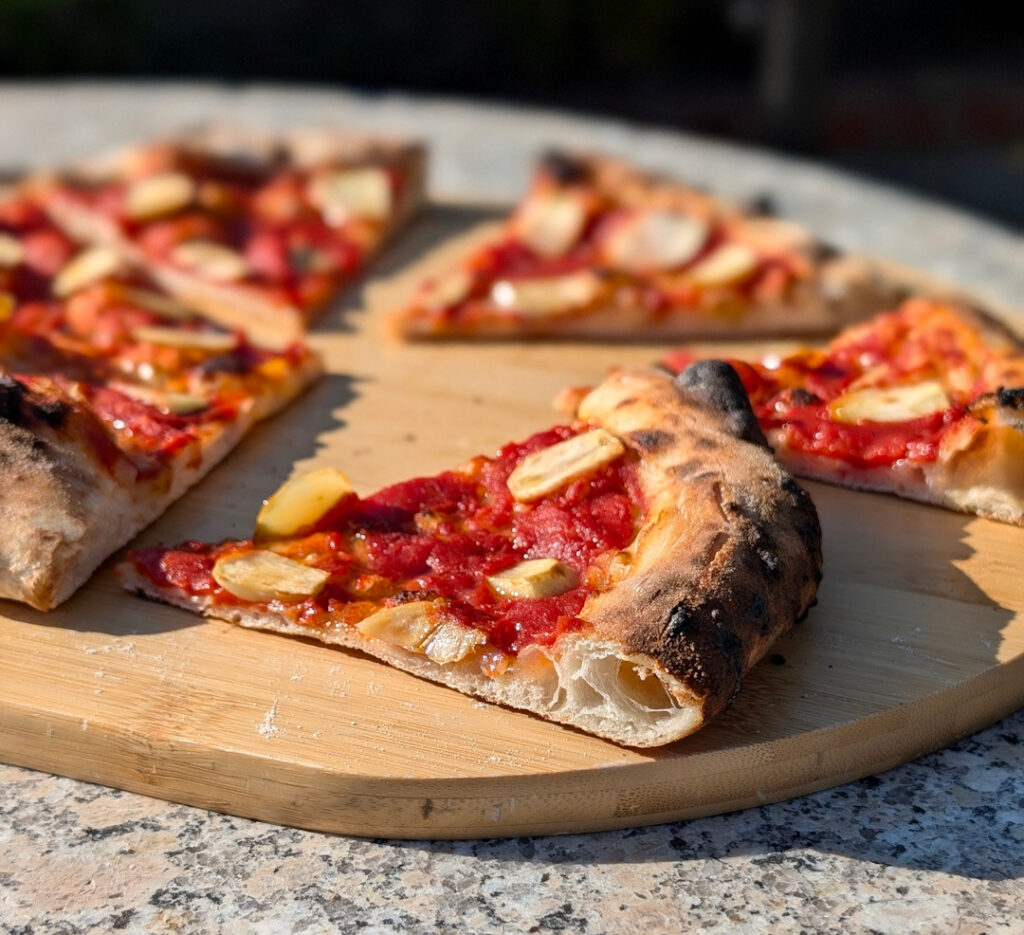
But today, we’re going to show you how to up the game of our Easy Peasy Pizza Dough by using a Biga starter to get incredible flavor and texture development. When I first made this Biga pizza dough recipe, it shocked me how wonderful the crust was!
Storing Biga and Biga Dough
You can develop your Biga the same day you intend to use it in your dough and you can use our dough the same day you make it. That’s perhaps not the optimal for development, but it will work.
You can also develop your Biga over the course of a couple of days and then ferment your completed dough for another day at room temperature – or even longer using the fridge.
You can even freeze your dough – but be very careful about getting a good seal. Freezer-burn in your crust is very hard to remedy!
Each dough recipe will have an ideal amount of fermenting time based on factors like the amount of yeast and fermentation temperature. Just make sure you give yourself a good 12+ hours for the Biga to get a head start!
Biga Pizza Dough Recipe
Ingredients
Biga Starter
- ½ teaspoon active dry yeast
- 2 ounces water warm, between 100°F and 110°F
- 3 ounces bread flour
Biga Pizza Dough
- ½ teaspoon active dry yeast
- ¾ cup water warm, between 100°F and 110°F
- 2 cups bread flour
- 1 teaspoon salt
- 2 tablespoons olive oil
Instructions
Making Biga
- Ensure your water is between 100-110 F. Hotter water will kill your yeast, and colder water will make it take much longer to activate.
- Add the first 1/2 teaspoon of yeast to 2 ounces (1/4 cup) of warm water in a small bowl or mason jar. Whisk and let stand for 5 minutes to ensure the yeast is active and alive.

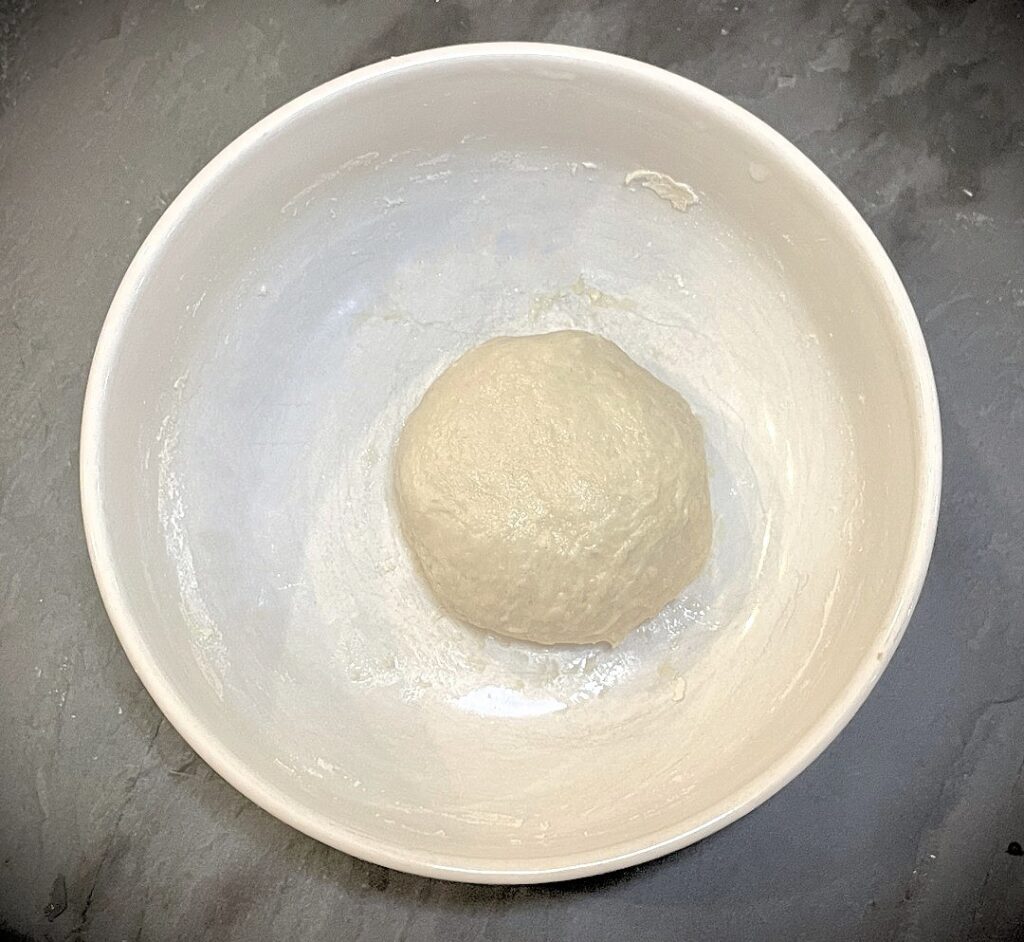
- Add 3 ounces (by weight) of bread flour. Stir with a knife or flat spatula. Once mixed, the starter can be worked by hand into a ball.
- Cover and store the Biga for at least 12 hours at room temperature or up to 24 hours. If storing longer, refrigerate after 12 hours at room temperature.

Making the Pizza
- Preheat outdoor pizza oven to ~800°F or indoor oven to 450°F.
- Ensure your water is between 100-110 F. Hotter water will kill your yeast, and colder water will make it take much longer to activate.
- In a medium bowl, dissolve the second 1/2 teaspoon of yeast in 3/4 cups of water. Whisk and let stand for 5 minutes to ensure the yeast is active and alive.
- Add the Biga to the water and yeast.
- Add in 1 cup of flour and mix it with the Biga, water and yeast.
- Slowly continue adding another 1/2 cup of flour, incorporating it into the dough.
- Add the salt to the dough and continue to mix.
- Add 1.5 tablespoons of olive oil, reserving 0.5 tablespoons to oil your pizza pan. Continue to mix.
- Add the final 1/2 cup of flour and continue mixing. The dough should be solid and not too sticky to work with your hands. If necessary, add small amounts of additional flour until you can work the dough without it pulling apart in your hands.
- After all the ingredients are incorporated, cover with a damp cloth for 1 hour.

Outdoor Pizza Oven Cooking Instructions
- Preheat outdoor pizza oven to ~800°F
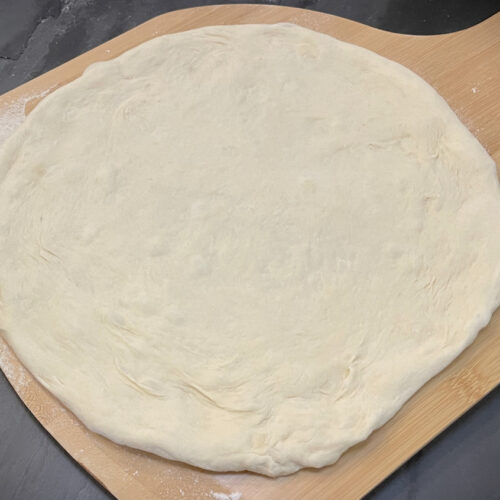
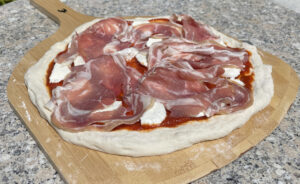
- Shape the dough into a circle. Try not to press the air out of the crust (especially not the edges). This recipe should create a pizza up to 14" in size, if made thin.
- Put the pizza onto a floured pizza peel.
- Top the pizza with your favorite toppings.
- Launch pizza into the oven.
- Rotate the pizza 1/4 turn about every 45 seconds.
- Bake for ~6 minutes until golden brown on top. Check the bottom for it to be fully done.
- Remove from the oven to rest for 3 minutes.
- Cut and serve immediately.


Indoor Pizza Oven w/Pan Cooking Instructions
- Preheat your oven to 450°F
- Lightly oil your pizza pan to help avoid sticking.
- After the dough has rested for an hour, lightly oil your hands and press the dough into a circular shape onto a pizza pan. Try not to press the air out of the crust (especially not the edges).
- Top the pizza with your favorite toppings.
- Bake for 18 minutes in a conventional oven, turning at 9 minutes.
- Remove from the oven to rest for 5 minutes.
- Cut and serve immediately.

Notes
Nutrition

Todd’s cooking skills have revolved around the grill since about age 12, when he developed a love for grilling and took over for Mom at the BBQ. He worked at Wendy’s and at Earl’s Tin Palace (a restaurant chain in Canada) but never really did any sort of baking…until he and Heather started making pizza together! Now he’s often making dough in the mornings and pizza in the evenings.